Pacific Coast Shay #213
70-ton, 3-truck, Class-C Pacific Coast type Shay
Having completed (or nearly completed) my first rolling stock, a caboose, it became evident that I needed something more to build. I was and still am helping Wayne rebuild his Pacific engine. It just so happened that another friend had the start of a Pacific Coast Class-C 60-ton 3-truck Shay stored in her basement. Her husband had purchased it in the late 70s/early 80s with the idea of completing it but he passed away before he got to it. It has sat in her basement ever since. She offered it to me at a good price so I decided to build a Shay.
The main frame, the tender frame, and all three trucks were assembled at the time of my purchase. The motor is started (the crank, pistons, cylinders, and motor frame are assembled). Many motor parts are yet to be designed and produced. The frames had a primer coat of paint, the trucks were bare metal.
Not knowing much about the Shay locomotive, I began a process of education and discovery. The plans that came with the loco I purchased were incomplete since the original builder was designing a new engine to scale to offer for sale in his business. This means that I will have to fill-in-the-blanks with design information from other sources. It should be an interesting challenge.
I have decided to use Pacific Coast Shay #2 from the Cass Railroad (originally Mayo Lumber #4) as my prototypical model. I am in the process of acquiring some drawings and pictures at this time. I like the look of its cab and tender and actually might get to see the prototype run someday.
I hope to keep a running log of pictures/narrative as I work on building my very own Shay locomotive.
November 1999 Update
Click here for the November 1999 updates and pictures.
5/28/2000
Click here to see the latest pictures from January 2000.
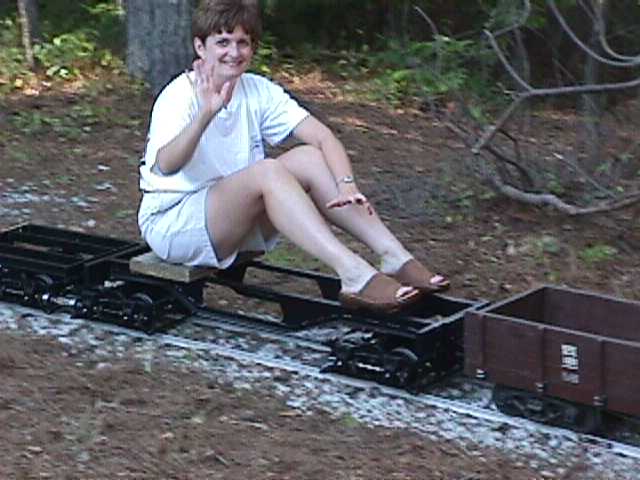
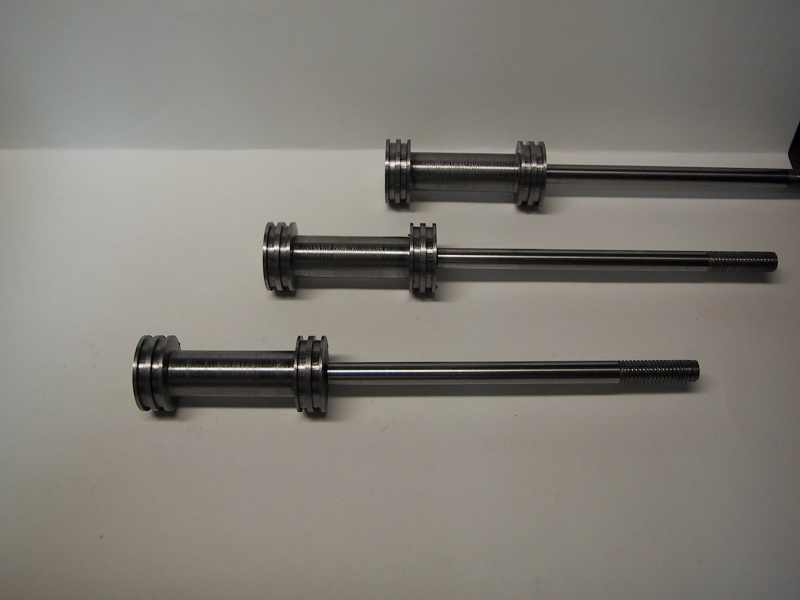
A momentous occasion…the first drive shaft assembly was completed and mounted on the Shay chassis. Since we were also running the American loco that day, we moved the Shay chassis to the track for a test run. It was towed by the American without any problems. Several people close to the project also rode the chassis (carefully). These people included my wife, Marjean, and Darlene Demianchik (wife of the original owner and a good friend).
Shay Update…Work Continues (12/24/2000)
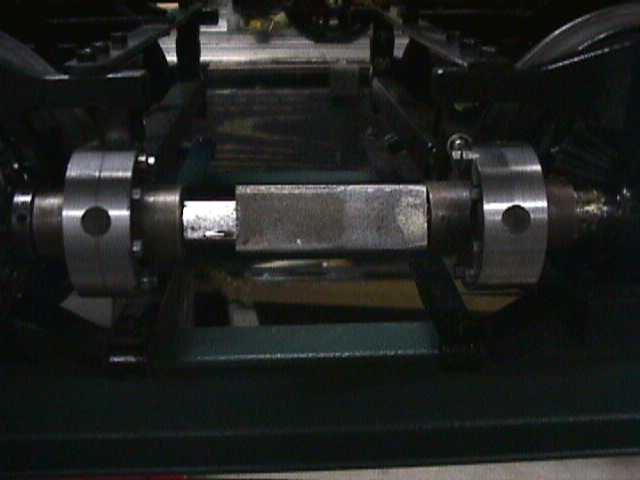
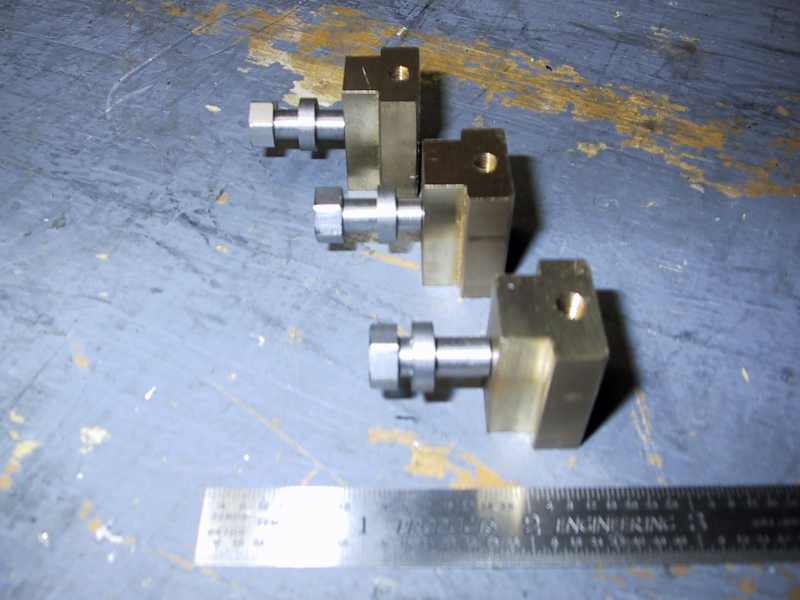
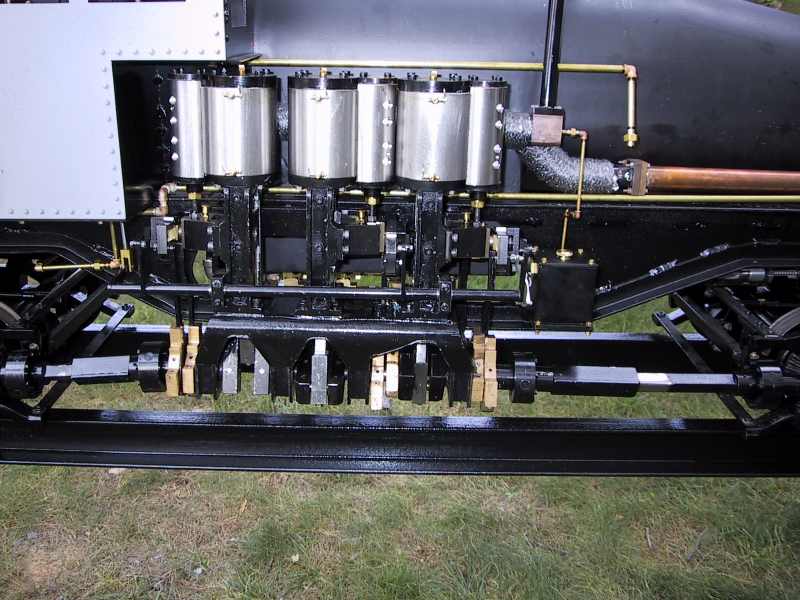
Progress on the Shay continues as time permits. The brakes are complete on each truck now. The water pumps (mounted laterally on the rear-most axle are also complete. The eccentrics for the valve gear are nearing completion (see picture below). Work on other parts of the valve gear is in progress (crossheads, reversing link, reversing link pivot, valve crosshead guides, etc. Erection drawings of the prototype have been obtained from the California State Railroad Museum. These drawings will assist in a number of ways including the precise location of the motor mounts. Take a look at the pictures below for a glimpse of the work being done and stay tuned for further updates.

Valve Crossheads Completed (01/20/2001)
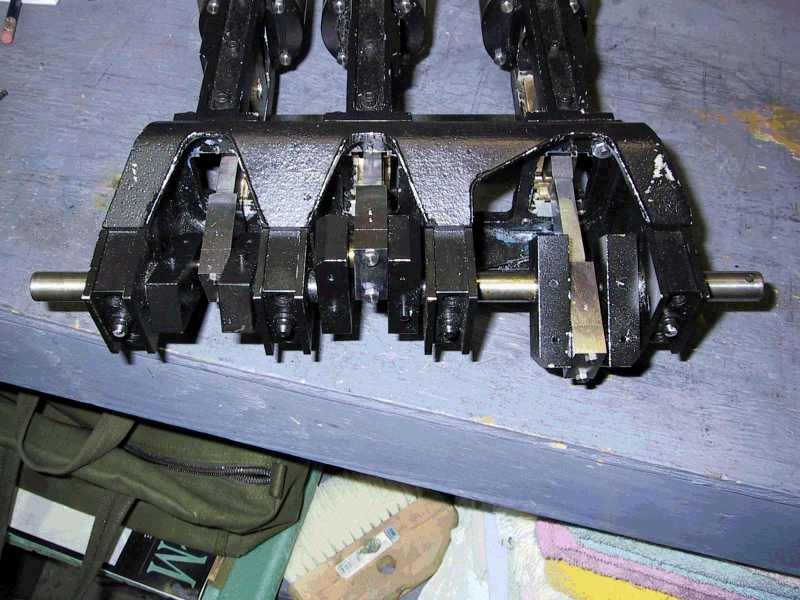
Progress on the Shay continues as time permits. I have been concentrating on the valve gear as of late. I have completed the valve crossheads, reversing link pivot pin and spacer (see pictures below). I am currently working on the crosshead stand/guide. I have the drawings but no castings so I am building the part (3 of them) from scratch bar stock.
Work Continues…Progress Being Made (Dated: 5/16/2001)
Work on the PC Shay is continuing although slowly at times. With the workshop bending its primary efforts to ready the boxcar and Fairfield’s Pacific for the Midsouth meet, little time has been available for working on the Shay. With that said, let me recap what has transpired since the last report and include a few pictures.
- The valve crosshead guides have been completed and mounted. Each was fitted with an oil cup to lubricate the valve crosshead.
- The three top cylinder heads have been fabricated, drilled, and mounted. The access hole in the top remains to be tapped.
- The reversing link assemblies have been completed. I contracted with a friend to make the reversing links from the drawings I supplied. I fabricated the remaining parts and have assembled the valve crossheads and links into a working unit. A drawings defect soon appeared as it became obvious that there was insufficient clearance for the middle cylinder’s reversing link to operate properly. This link was redesigned with the needed clearance being provided by a thickness reduction of several parts. No adverse effects from this modification are expected.
- The piston rod to piston connection dilemma has been resolved with the use of small jam nuts and by boring a countersink on the inside of the top cylinder heads. This appears to be a practical solution to a design problem.
- The valve eccentrics were completed with the final machining and drilling to allow mounting on the crankshaft and the attachment of the link blades.
- No drawings existed for the link blades so I consulted another set of drawings to determine the proper way to formulate the length and drew up my own plan. The link blades have been fabricated.
- The valve eccentrics have been mounted on the crankshaft although the valve timing has not yet been set.
- The link blades have been mounted to the eccentric straps and fitted to the reversing links as needed. The final attachment pins have yet to be fabricated so temporary pins are being used at this time.
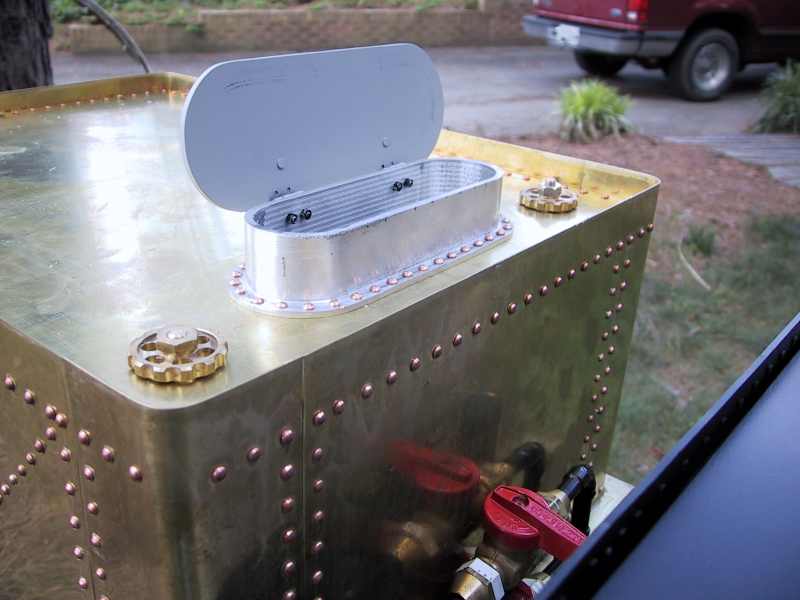
- I have obtained full-scale drawings of the prototype for determining the size and shape of the tender tank. A paper model of the tank has been constructed and fit to the tender frame for aesthetic review as well as to determine plumbing needs. I am planning to build the tender tanks from 22-ga brass with a 16-ga brass bottom and top (for strength).
Click here to see the latest pictures from May 2001
Click here to see the latest pictures from June 2001
Work List
- Fabricate the reversing rod, bearing blocks, and connecting rods. I may have to disassemble the cylinder support stands (and all the valve gear) to allow me to drill/tap for mounting the bearing blocks. (Boo hiss….)
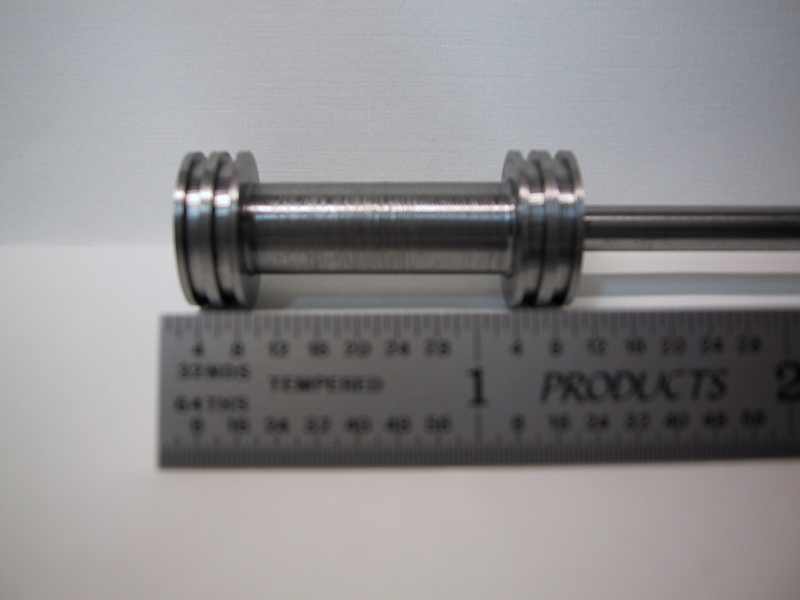
- Mount all drive shafts. Each drive shaft needs to be mounted and drilled for its attaching roll pin. Final attachment of the drive shafts will wait until the valve gear is timed and finalized.
Valve Pistons Completed (Dated: 7/1/2001)
Work on the PC Shay continues. Since the last update, the reversing gear link blades have been painted and reinstalled. The pivot bolts that attach the link blades to the reversing link have been fabricated and installed as well. The drive shaft mounting holes have all been drilled and temporarily mounted. The latest completed item is the valve pistons themselves. Work is in progress to make the rings, top and bottom steam chest heads and the steam cylinder liner.
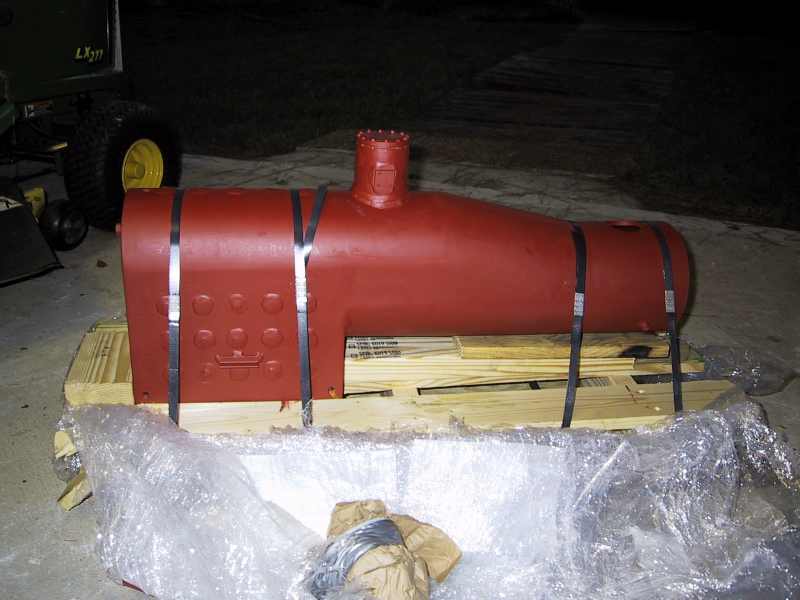
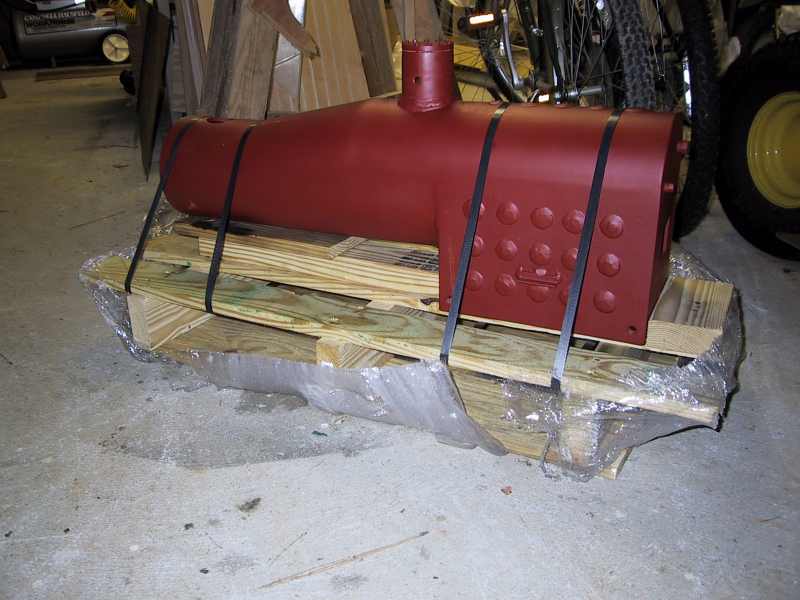
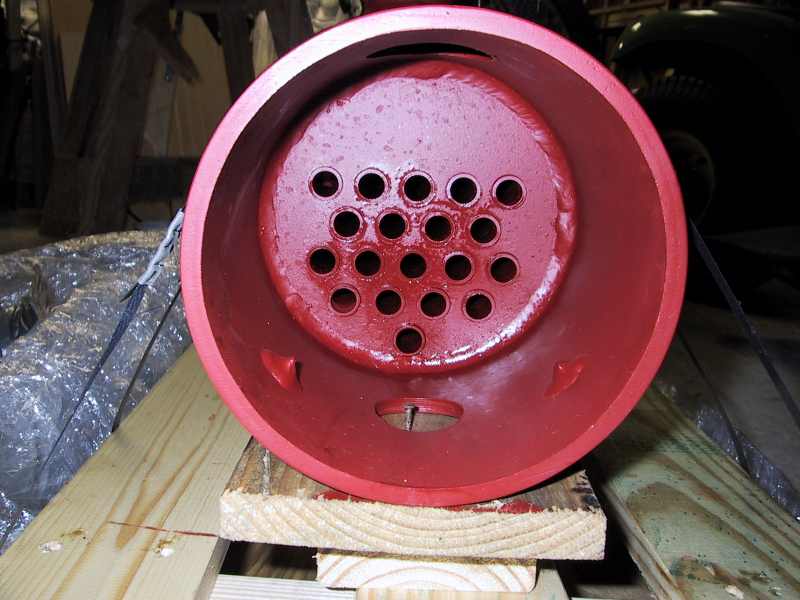
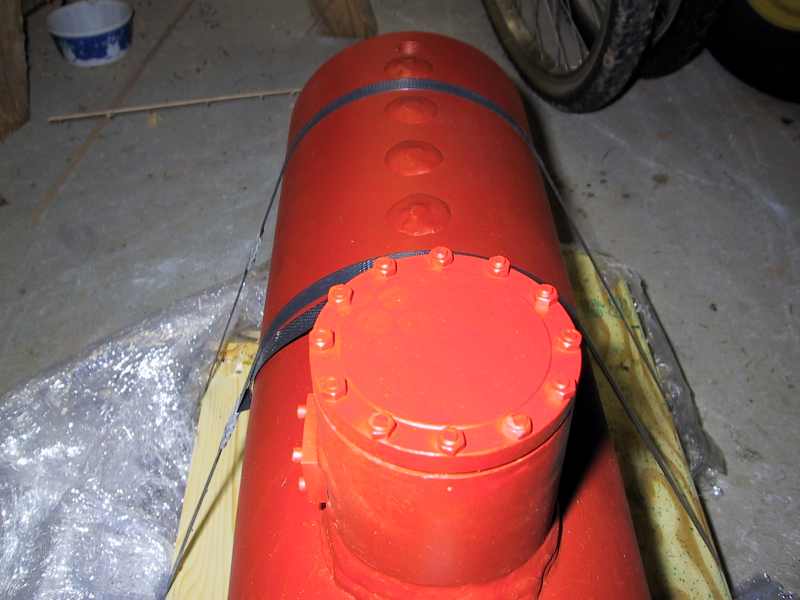
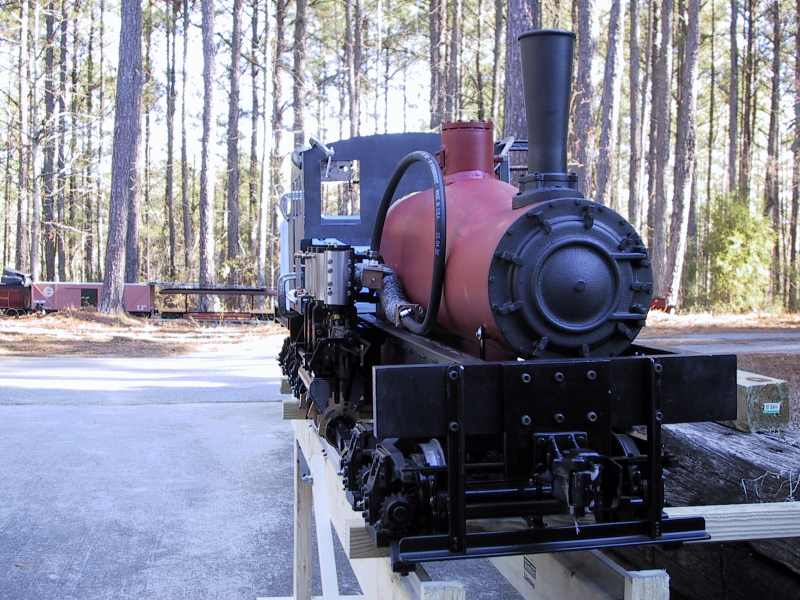
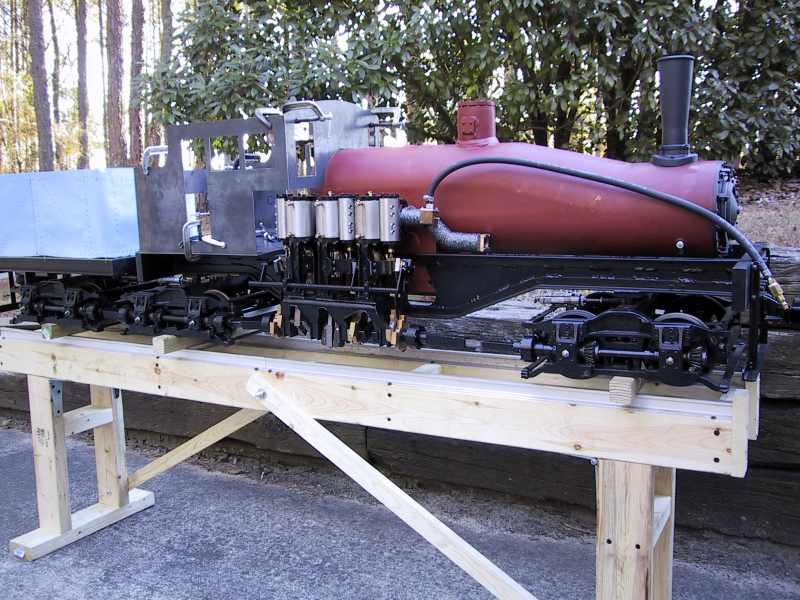
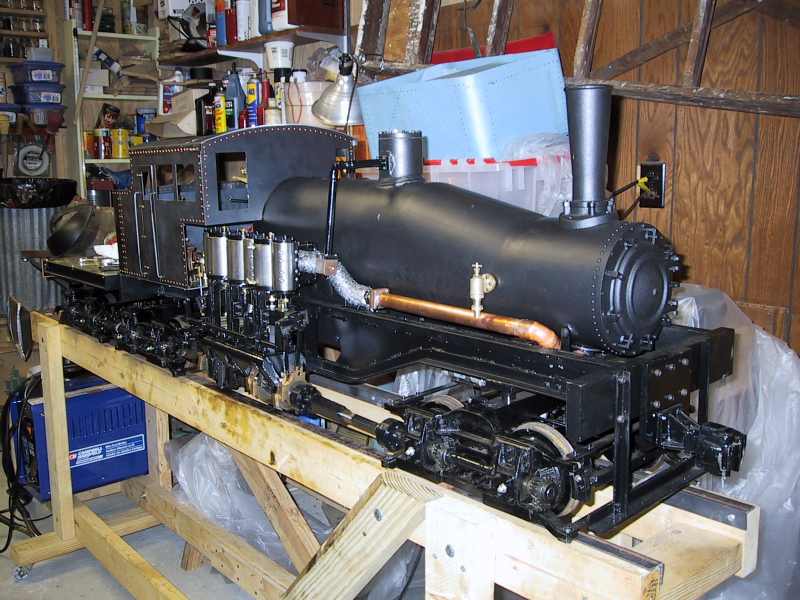
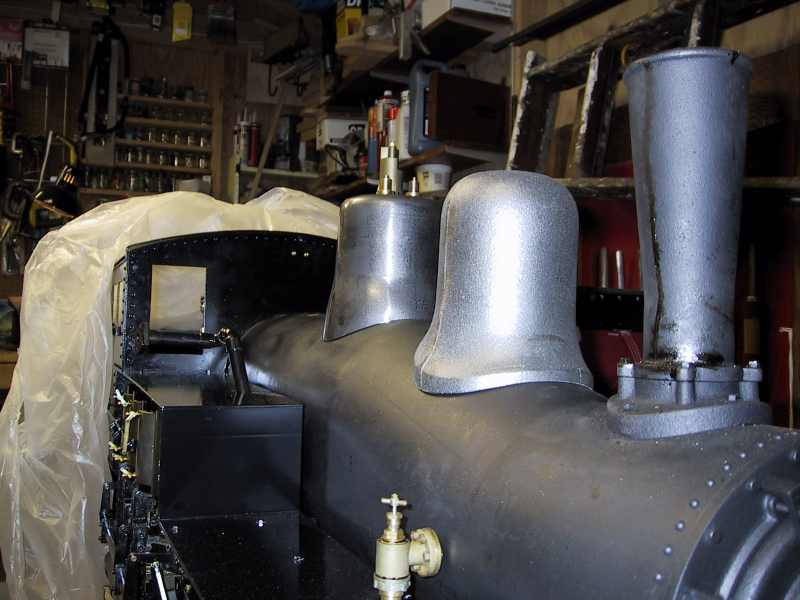
New Boiler Arrives at DAMAR Shop! (Dated:9/7/2001)
Late this afternoon, I picked up the new Shay boiler from the cartage company loading dock. Weighing in at 115 pounds and mounted on a pallet, it has arrived safely and without a blemish. As usual, Ray Pennel of Steam Age USA has done a superb job. The workmanship is gorgeous. I can not wait to test fit it to the frame and see for the first time the Shay locomotive. Take a look at the pictures below!

Halloween Train Rides (Dated:11/24/2001)
The first annual Halloween train ride was a great success. Since it was a full moon for the first time in over forty years, we thought it would be a great opportunity to run the trains and meet some people. A few flyers were put out in Wayne’s neighborhood. By 5pm we had the train running and as it started to get dark, kids and adults began to stop by for a train ride and some conversation. By my estimate, about 40 people stopped by. The train ran perfectly (again).
Shay Progress (Dated:11/24/2001)
A lot of things have been happening with the shay as of late. Wayne and I have started getting together two times a week to work on trains. We still one night at his shop where we are working on 3 sets of three low-profile riding cars. The second night is at my shop and it focused on the shay. As a results of this and the associated renewed focus, a lot of great things have been happening. The short list of things that have been completed is:
- Steam chest cylinder sleeves turned and pressed in
- Steam chest heads (upper and lower) completed
- Steam chest steam passages drilled
- Inlet steam header fabricated
- Steam exhaust manifold fabricated
- Steam manifold fabricated (drilled, tapped, and mounted)
- Smoke box door completed
- Steam valve piston rings completed
Click here to see the latest pictures from November 2001
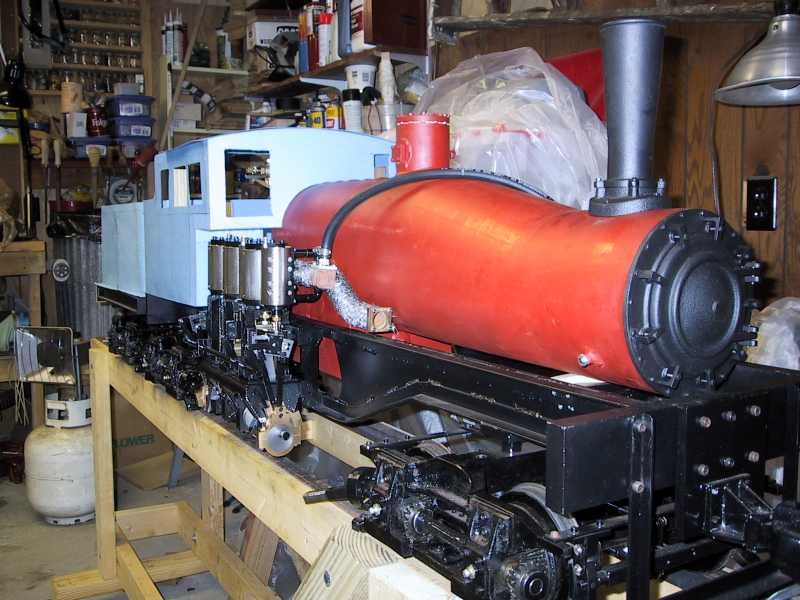
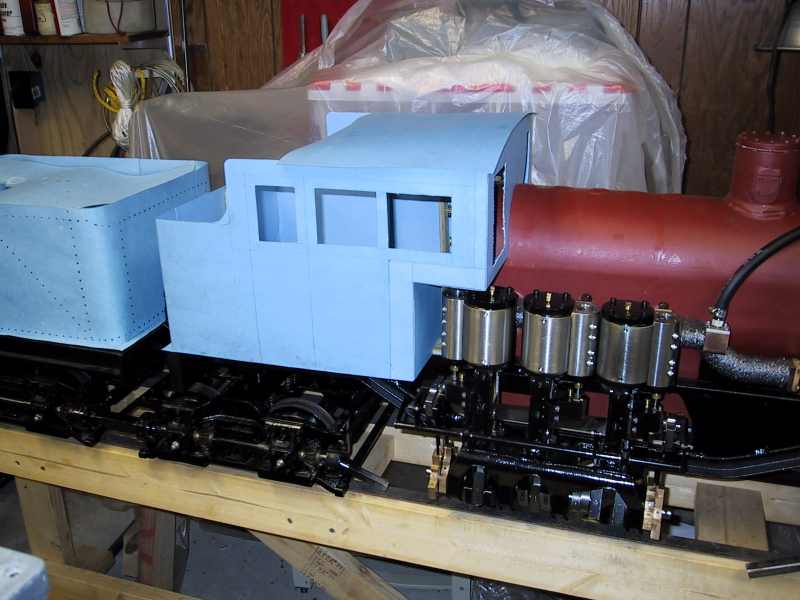
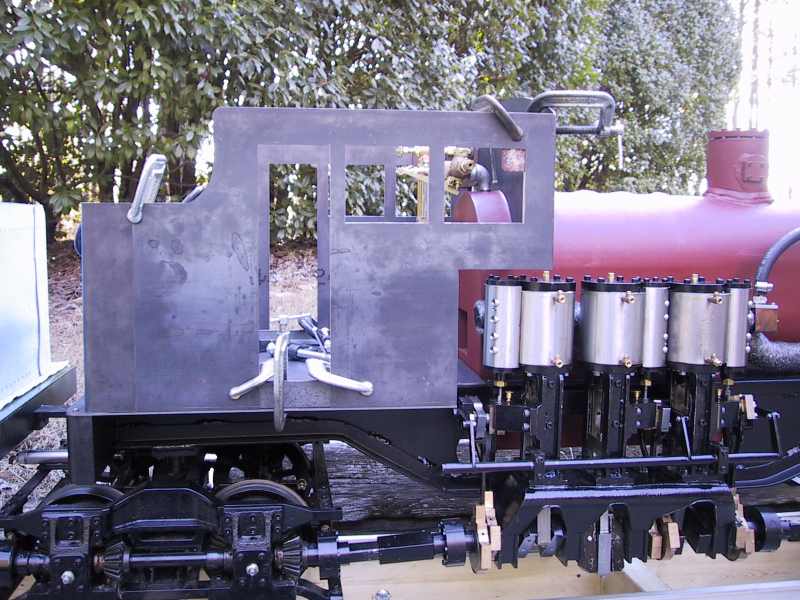
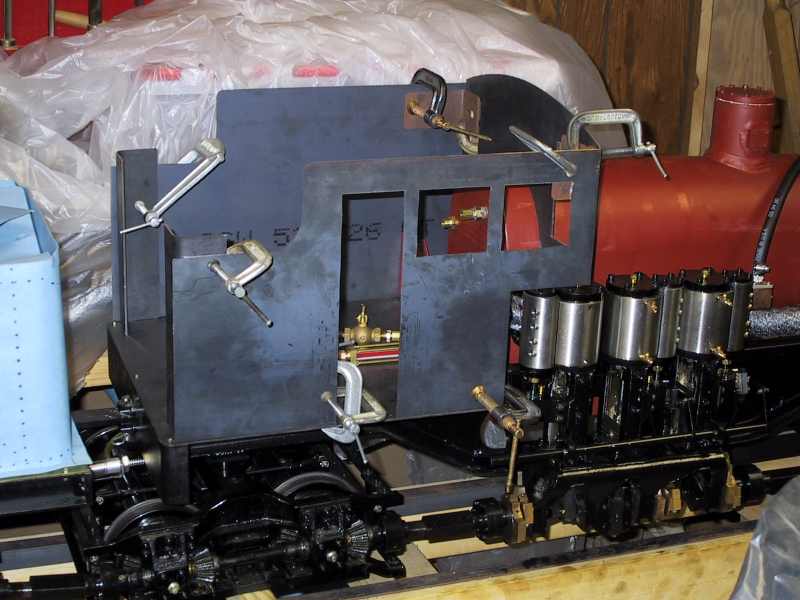
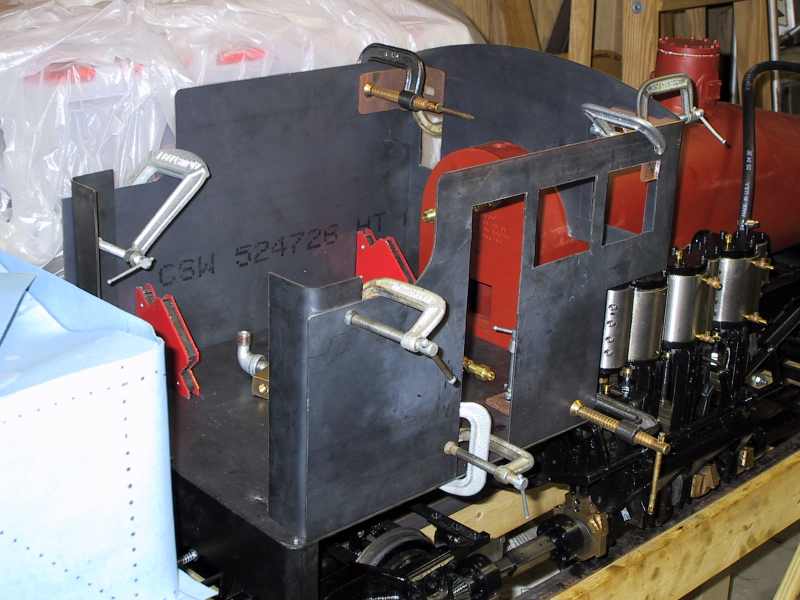
Cab Mock-up Completed (Dated:12/22/2001)
A poster board mock-up of the Shay cab has been completed and mounted for review. The boiler mounts are also complete and standing ready for final assembly.
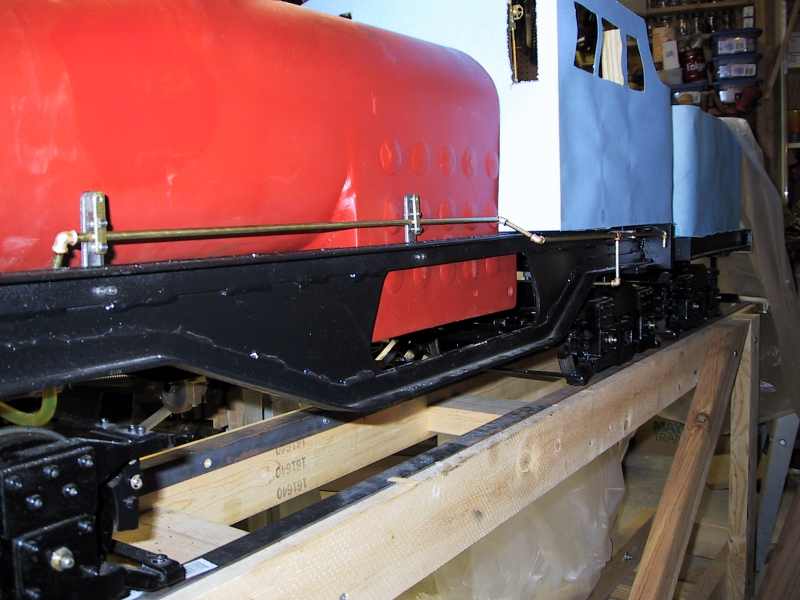
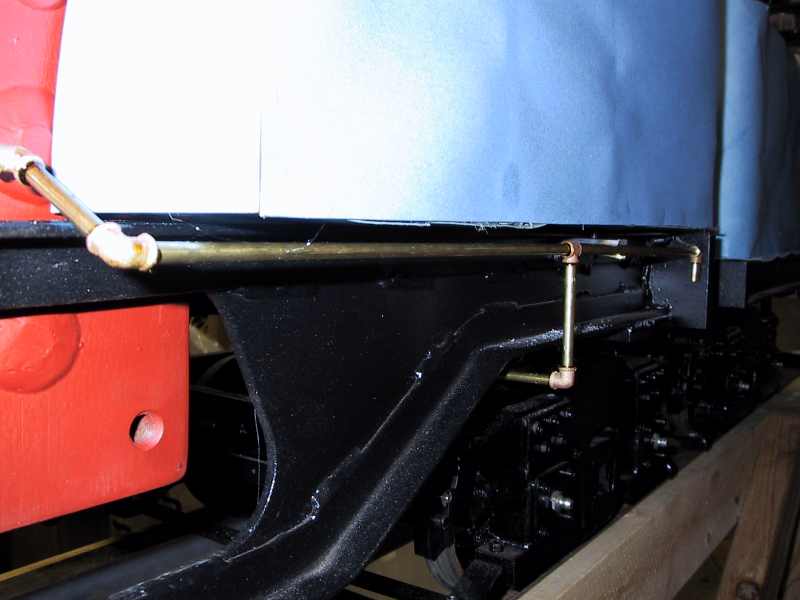
First Plumbing Installed! (Dated:12/23/2001)
Another milestone was reached today in the DAMAR backshop. The first plumbing was installed in the Shay. It consists of the air brake line running from the front-most truck to the end of the main frame. It also has the connection subbed in for the brake stand. The front and middle trucks are connected to the portion that is installed.
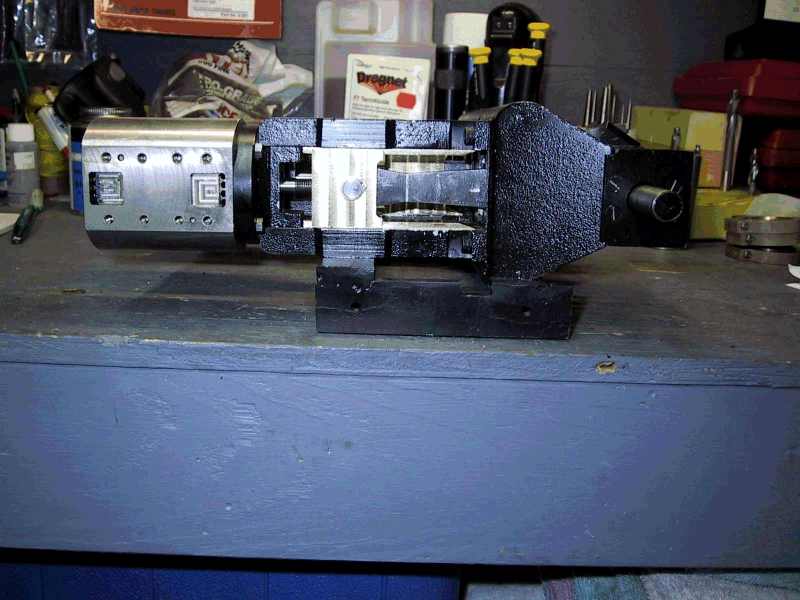
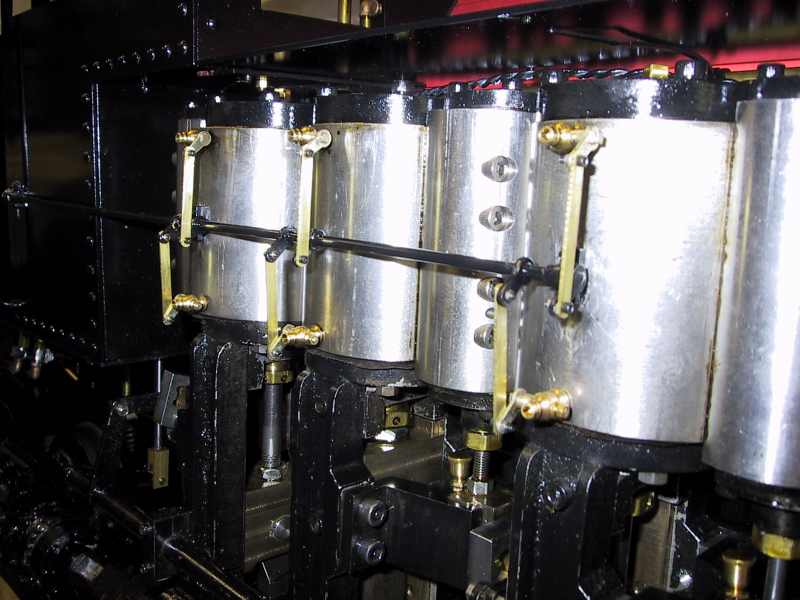
Motor Runs on Air!! (Dated:12/26/2001)
DAMAR Southern Railroad is proud to announce that last night, December 26, 2001, the Shay motor was successfully timed and run on compressed air for the first time. The motor ran very well for its first attempt, eventually running on as little as 10# of air pressure. We made several minor adjustments to it as the evening progressed. Several of the packing glands need to be repacked before more tests are run.
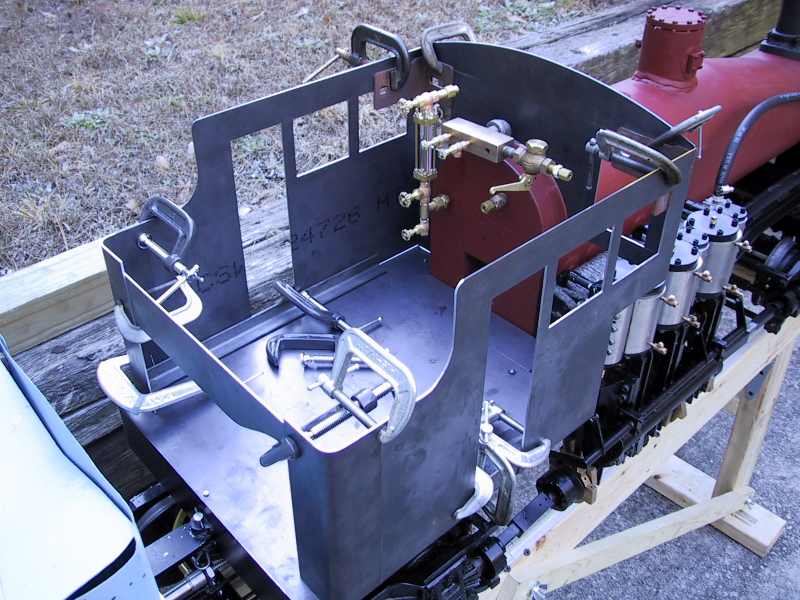
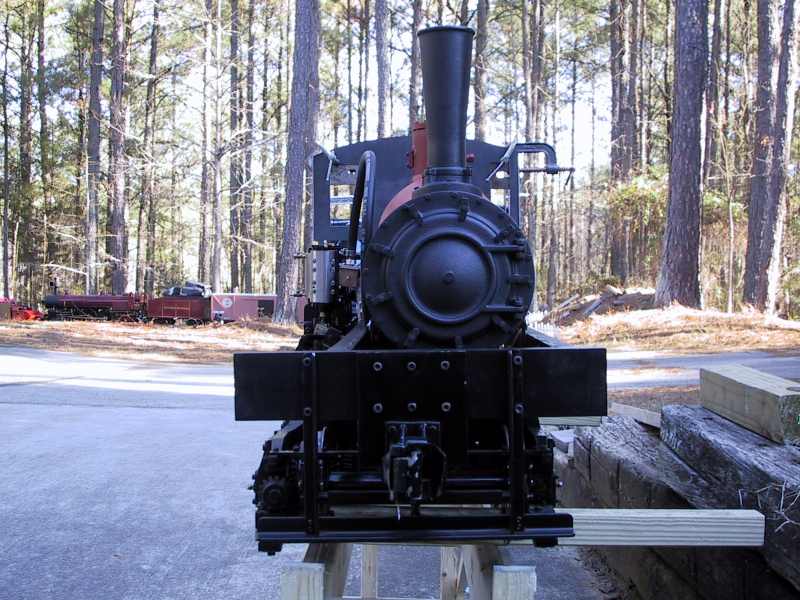
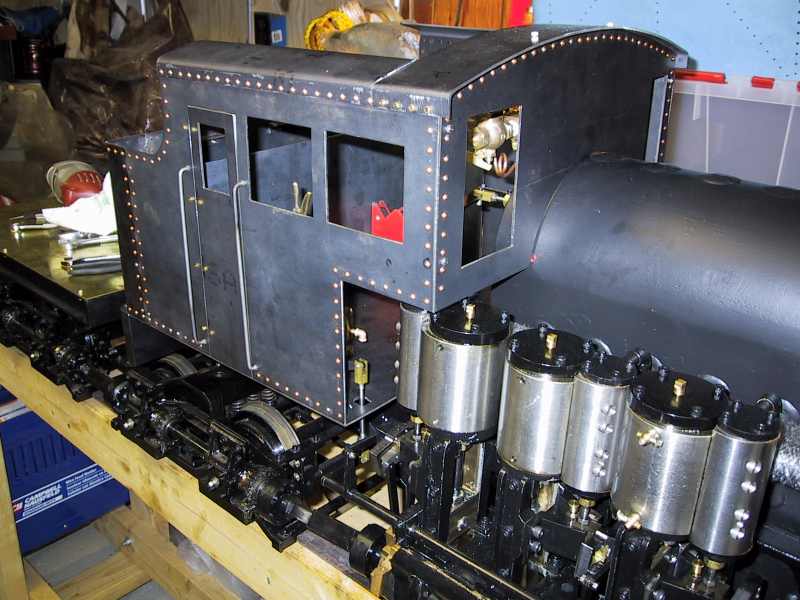
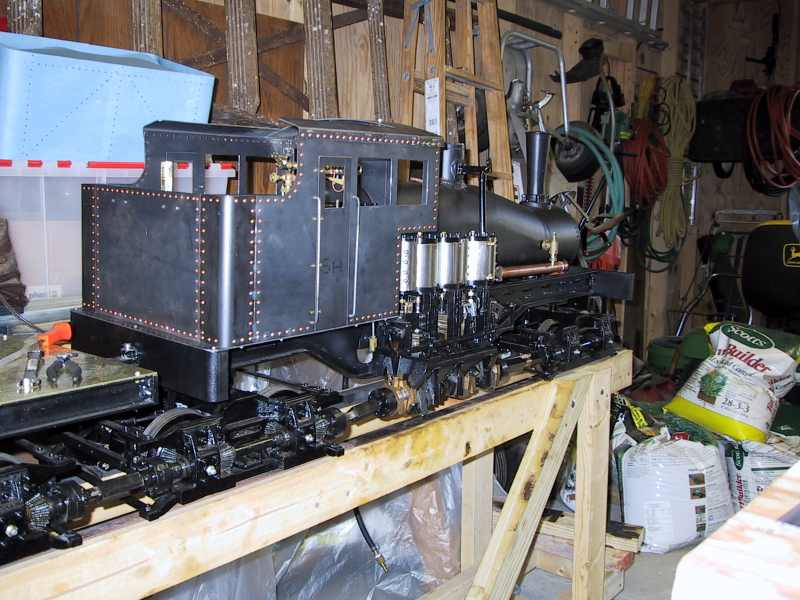
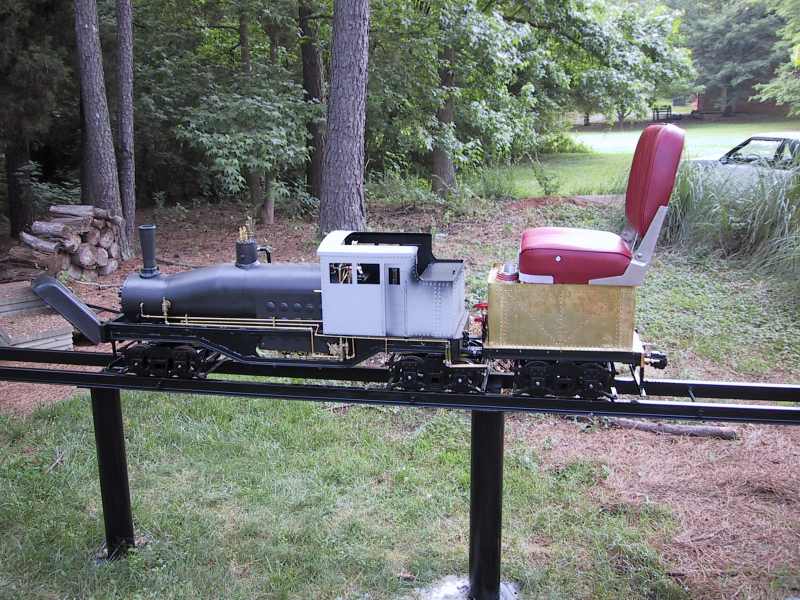
Steel Cab and other Progress (Dated:01/25/2002)
A lot of progress has been made in the last few weeks and more is underway. Here is the list of the latest progress
- Motor Tests – The packing glands have been repacked and further trials and demos of the motor running on compressed air have been done. The motor has been mounted to the chassis and the drive lines attached. Tests of the entire drive line have been a rousing success!
- Steel Cab – the cab is all cut-out and the doors and windows filed to proper dimensions. Most of it has had the rivet detail added to it as well. The cab doors are attached on working hinges and hand rails for entering the cab have been fabricated. The cab roof needs to be fabricated and the attaching rails added to the sides so it can be bolted to the cab floor. I have decided that the fuel oil tank portion of the cab is going to be a tool box instead of a tank. As soon as all the pieces are ready, the cab will be welded up and readied for paint.
- Throttle – The inside-the-boiler ball throttle valve has been installed. The throttle rod and throttle lever have been fabricated and attached.
- Boiler – The boiler has been removed from the chassis. All the remaining holes that needed drilled and tapped have been made (mostly for backhead attachments) except for the blower pipe entrance to the smoke box and the exhaust nozzle attachment.
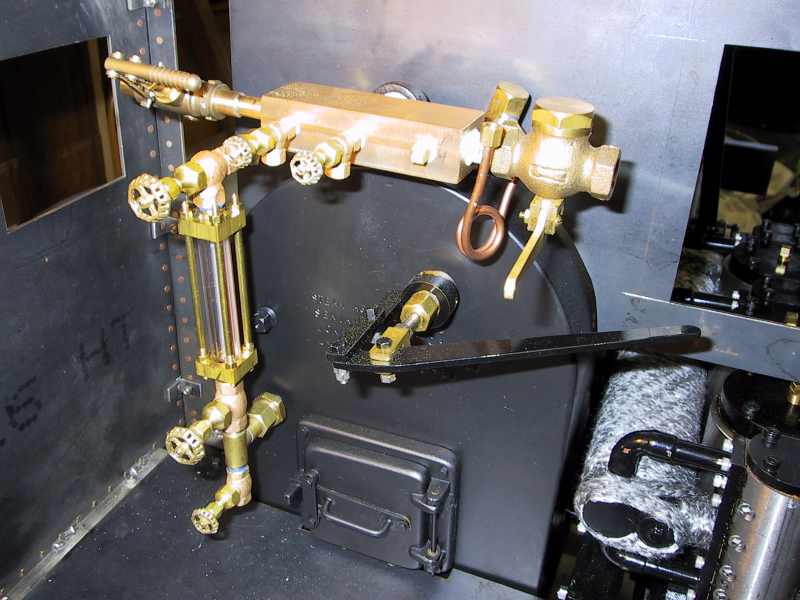
- Backhead – The backhead is complete except for painting and final plumbing. The pressure gauge, water glass, steam manifold, throttle, and fire box door are all finished and mounted. They have all been removed for painting.
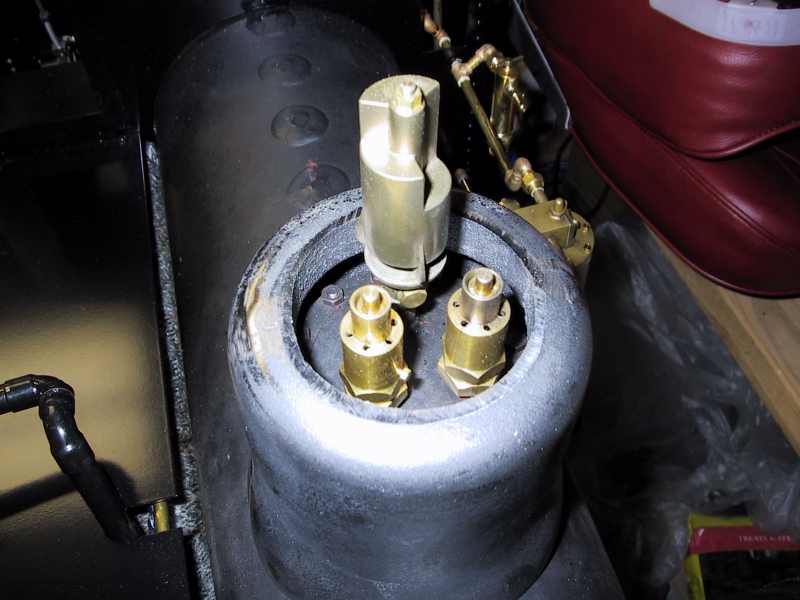
- Exhaust Nozzle and Petticoat – Work on fabricating the exhaust nozzle, blower collar, and exhaust petticoat are well underway. Completion is expected in the next few days.
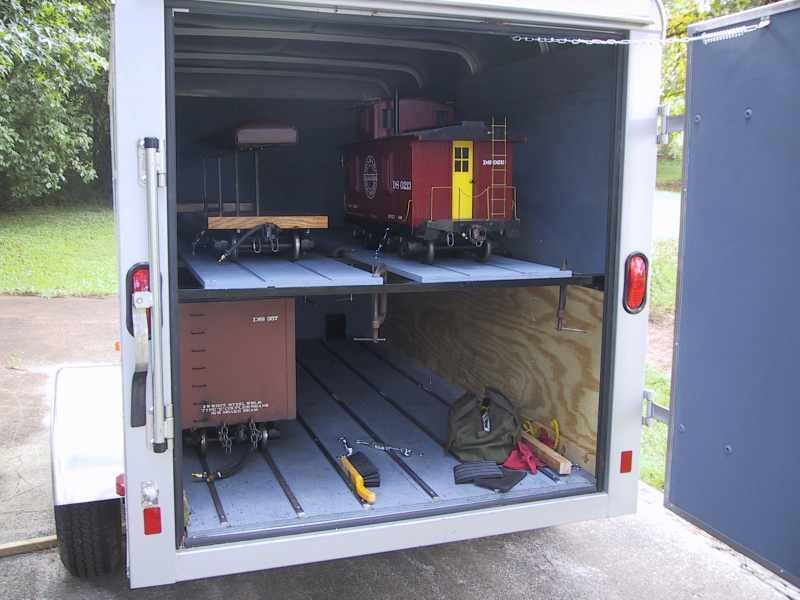
Shay Passes Boiler Inspection (Dated:03/23/2002)
On Saturday, March 16, 2002, Shay #213 was hydro tested for the first time by the NGLS club. This was new experience for me even though I had attended these hydro tests in the past. The difference was that I had a loco of my own to be tested. Since it was a brand new fully-certified boiler, I did not expect to have any problems passing but it was still a good feeling when the testers announced that it passed. I got my paperwork and loaded it back into the trailer. A couple of issues were uncovered…mostly leaks (I have not tested everything yet!). Also, my new pressure gauge appears to be faulty. It will be sent back the vendor for replacement.
I was unable to attend the official boiler inspection the following Saturday (3/23) to personally witness the Shay inspected and certified by the State of Georgia inspectors. Many thanks go to Wayne Lass for dragging his trailer with the Shay in it to the inspection along with his 2 locos. I sent along all the paperwork from the boiler maker, Ray Pennell, for the inspectors. Apparently they liked having that and passed the boiler without any problems.

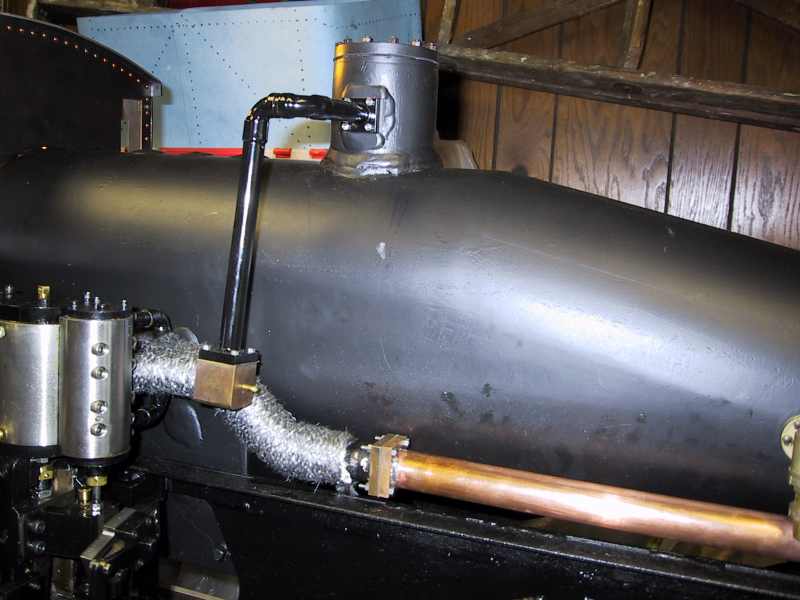
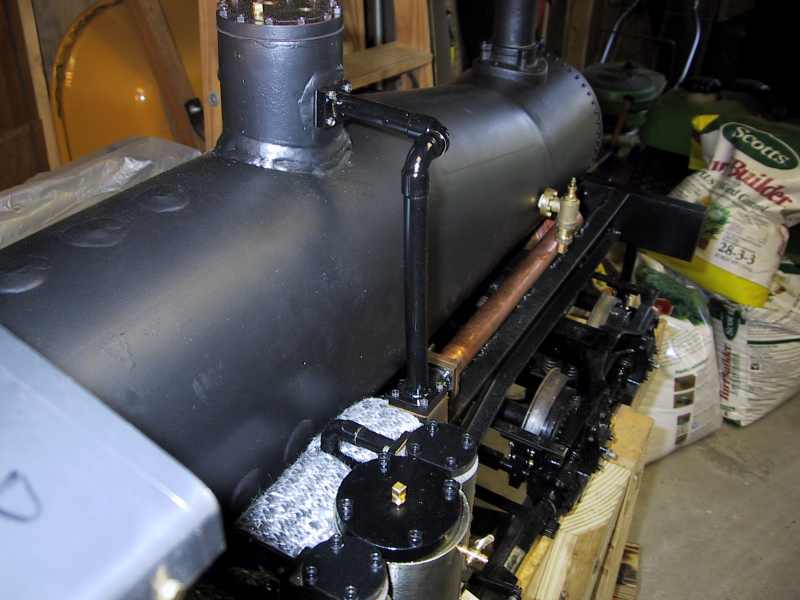
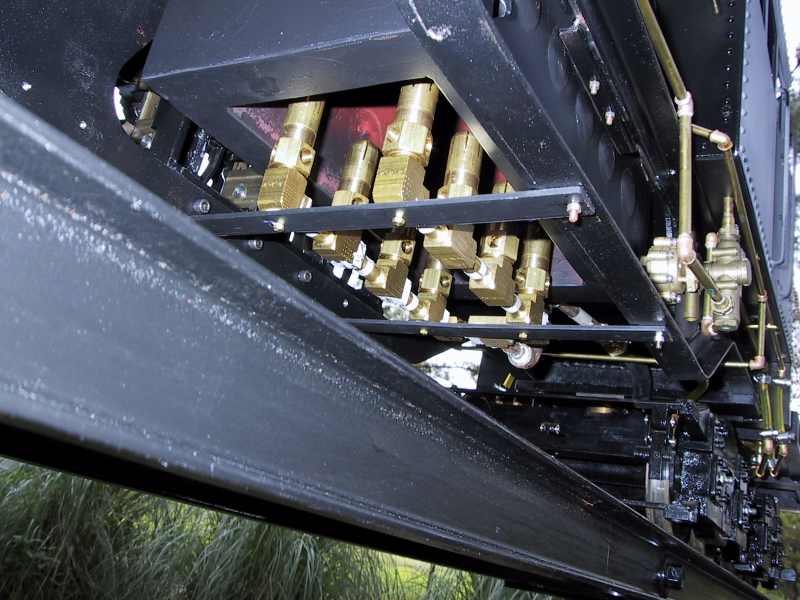
Shay Work Continues…Plumbing (Dated:03/29/2002)
Well I knew that sooner or later I would have to start working on the plumbing. Its not really all that hard it just takes a lot of time to get it right. Sometimes it seems like it is impossible to get a joint to stop leaking! Along with the plumbing lots of other things have been done since my last update. They are:
- The boiler has been remounted on the frame.
- The contents of the smokebox is complete (smoke stack, petticoat, exhaust nozzle). The blower pipe has been attached to the blower ring and extended outside the smokebox.
- Dry pipe extended and connected to the motor. The motor can now be fed steam (compressed air) directly from the boiler when making tests.
- Exhaust outlet connected to the exhaust nozzle. The steam exhaust line from the motor is now completed to the exhaust nozzle.
- Cab assembled and nearly complete. All the rivet detailing is done and the panels have been welded together to form a complete cab. The roof has been fabricated and attached. The front panel of the cab is detachable so three sides of the cab can be removed for servicing. Holes in the cab floor have been match drilled with the sides so the cab can be attached to the floor.
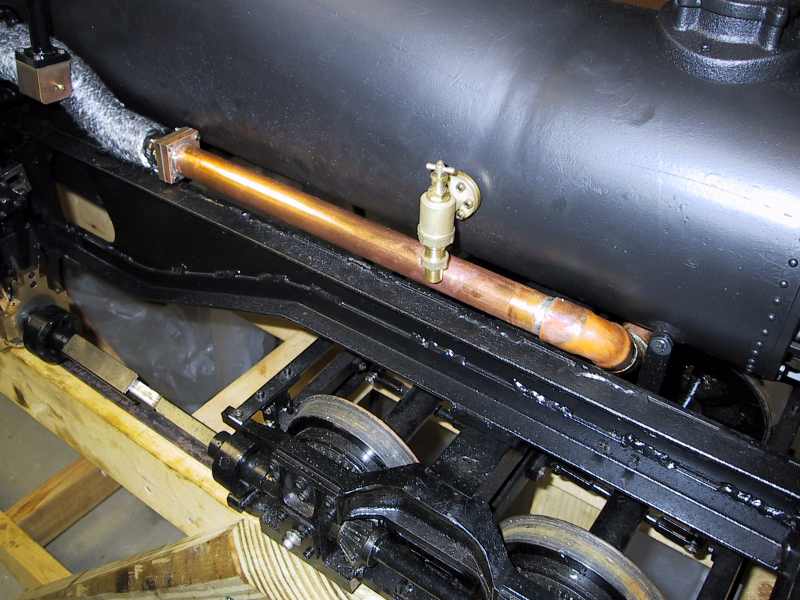
- Backhead steam manifold is attached.
- Whistle valve attached
- Injector starting valve attached.
- Fabrication of the tender tank has started. The pieces were all cut using a friends shear. Rivet holes have been laid out and the corner pieces have been bent to the 1″ radius required. Brass angle has been ordered and should be delivered this week. The tender hand pump and tender-resident valves to control the axle pump bypass and injector are ready for mounting in the tender floor. Drawings of the tender plumbing have been made.
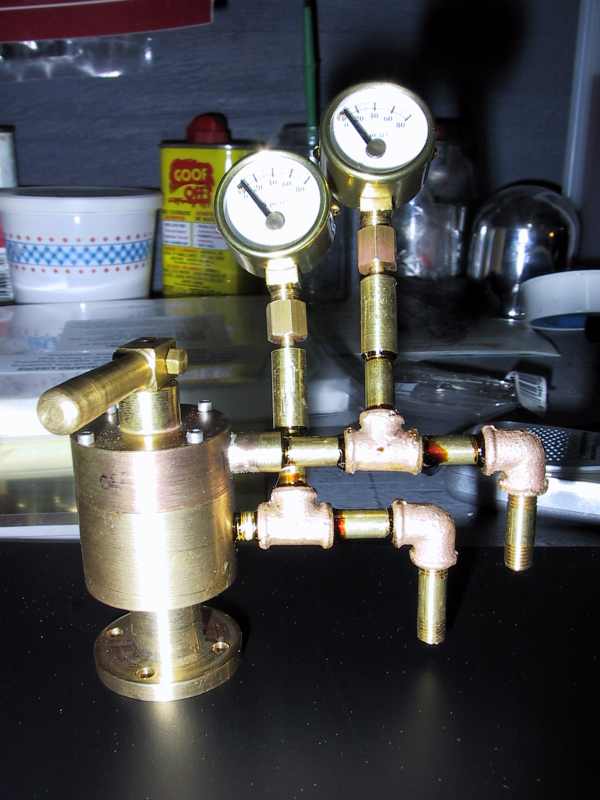
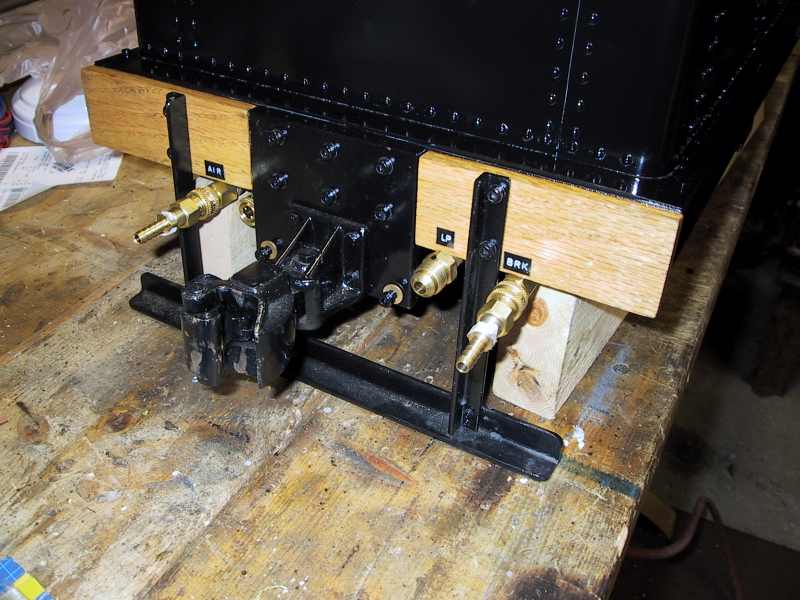
Injector and Brake Stand Ready (Dated:04/04/2002)
The injector plumbing has been completed on the main chassis. All that remains is to test the connections to insure they are watertight. The brake stand has also been plumbed but is not yet mounted and integrated into the overall brake system.
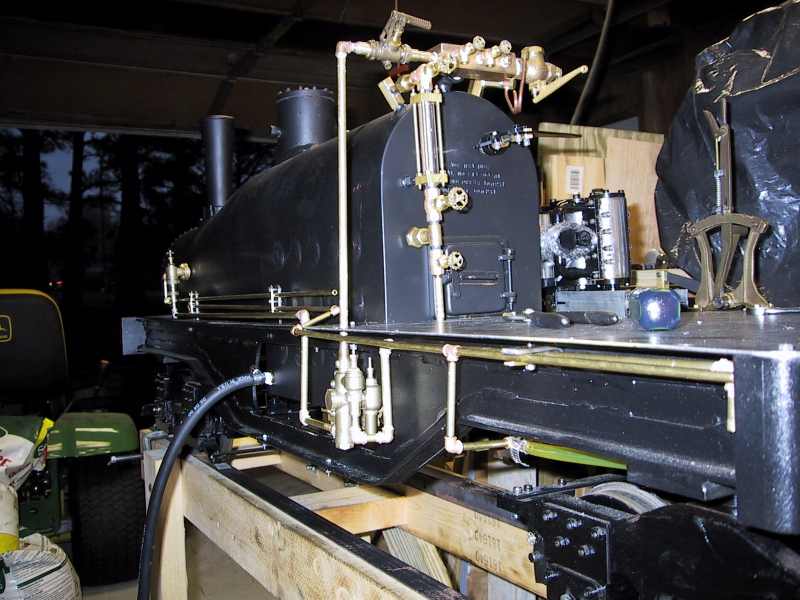

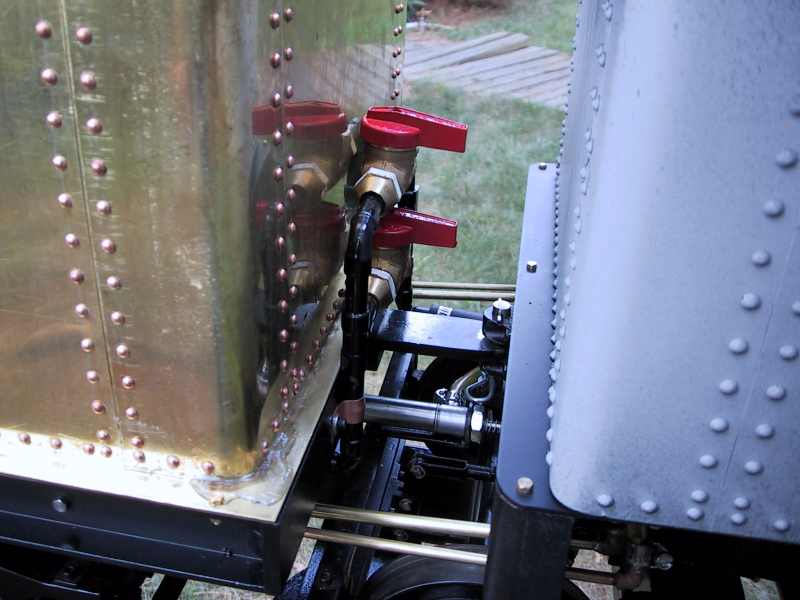
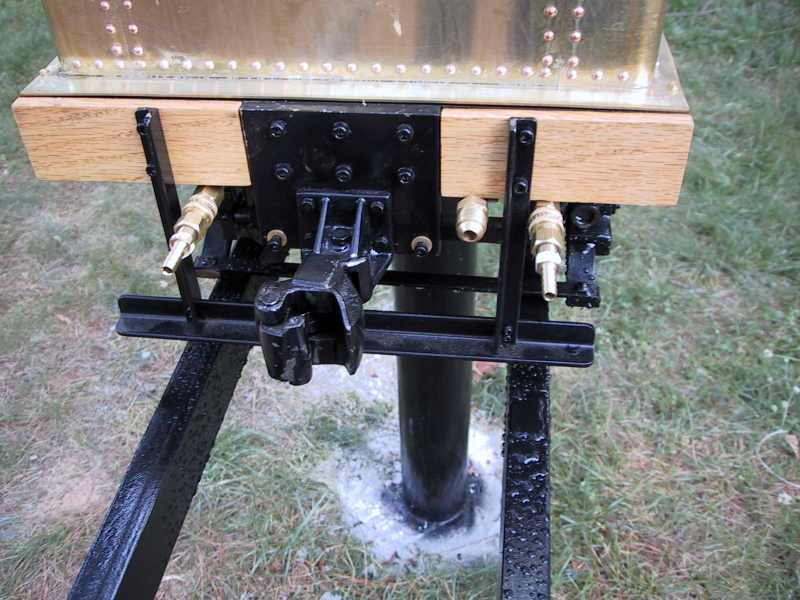
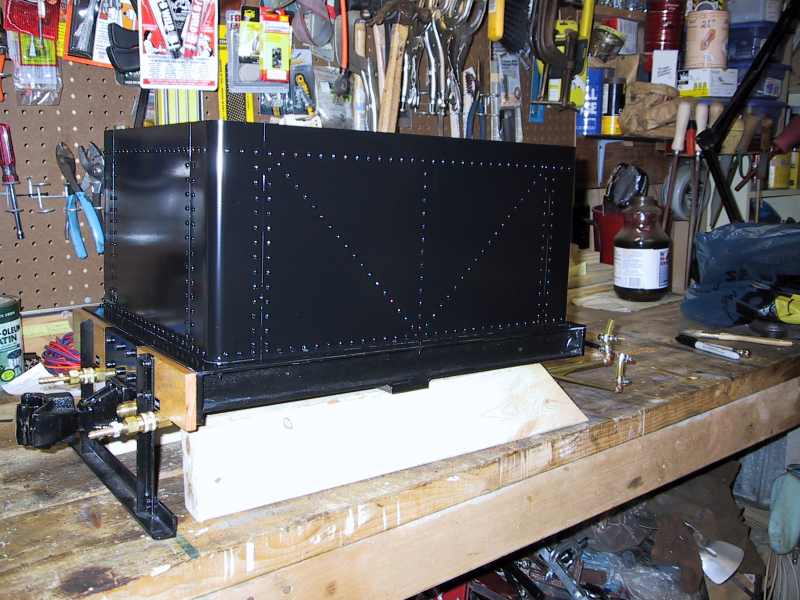
Tender Tank Completed (Dated:05/25/2002)
Well its finally done! The last of the rivets were installed early in the week and the process of sealing the tank was started. First the cleaner, then the etcher, and finally the sealant. It worked pretty well except for in the corners. The gaps were a little too big I guess. A little silicone sealer and that fixed that. Today I started doing all the plumbing under the tender. It was a long day but I finally got it all done. I flipped it over and sat the tender (with its frame) back on the rear truck. It looks pretty good! I have attached two of the 4 crossover pipes to bridge from the tender to the loco frame and will do the rest tomorrow. The tender has a hand pump in it along with two valves that control the axle pump bypass and the injector feed water. They work great and look good too.
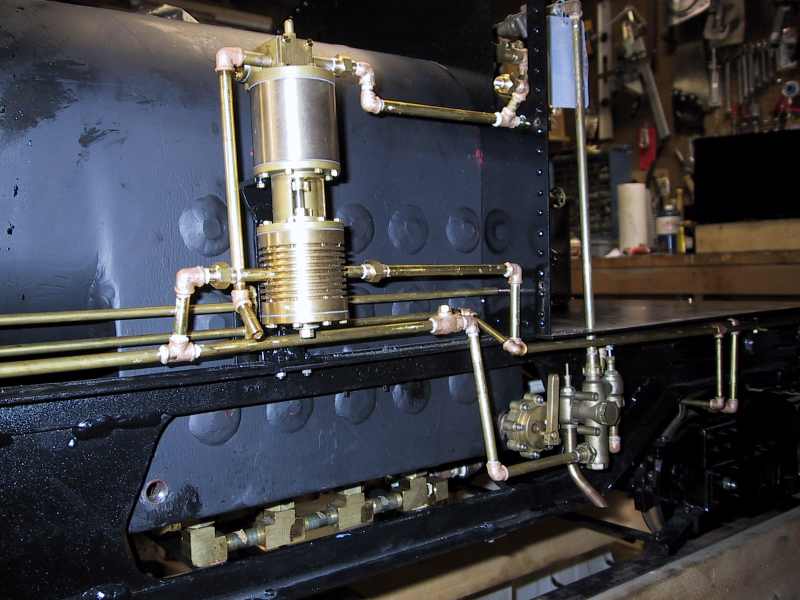
In other work that has been completed, the lubricator is mounted and plumbed and ready to got to work. The entire cab has been primed and the interior has been painted its final color (semi-flat black). The cab has been mounted to the floor for testing and also so I can finish the drain cock actuating lever. All the plumbing on the backhead has been completed. I also stubbed in a line to a steam-driven water pump and a steam line to heat the LP tank. The brake system is all plumbed and ready to go. I expect to make the first fire in it in a few days. It has all the components that it needs now to be fired safely so that testing can begin!
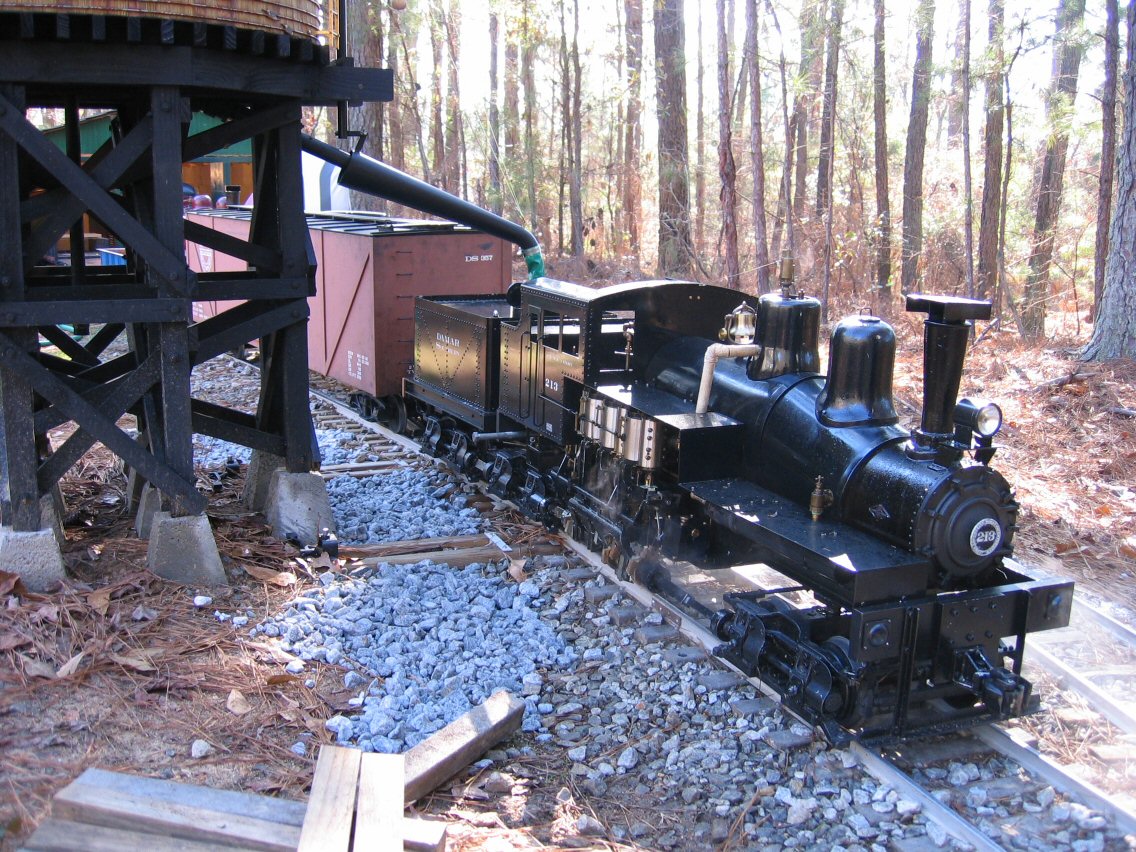
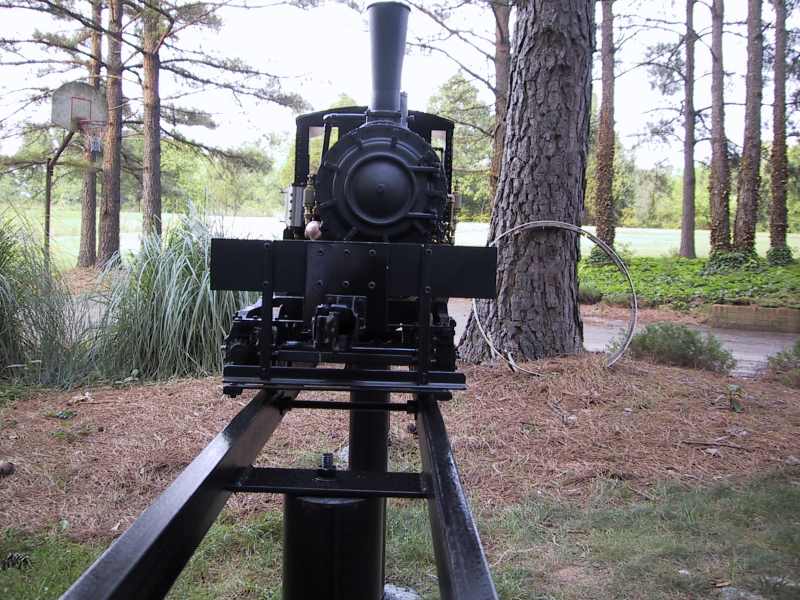
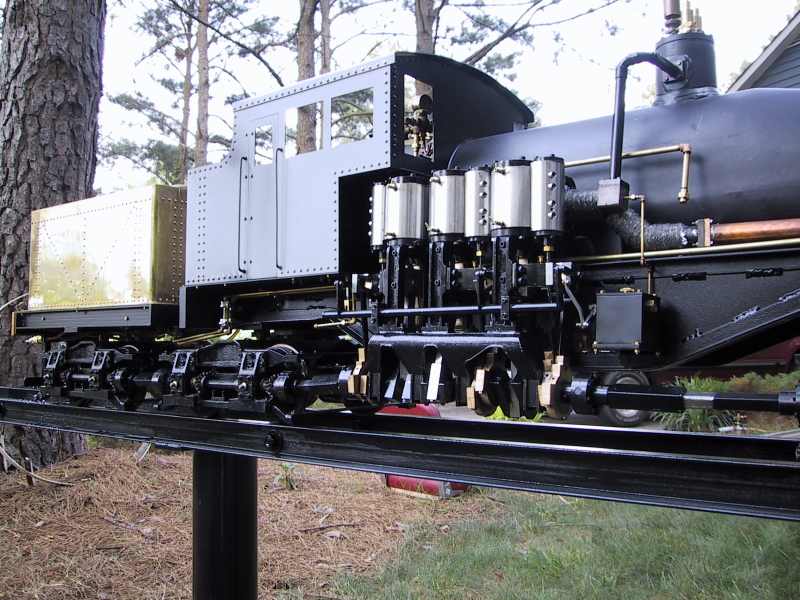
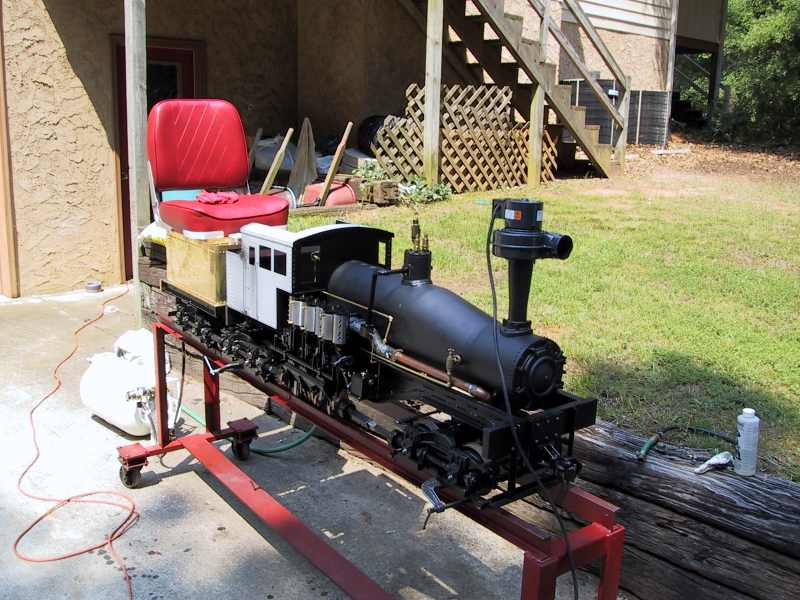
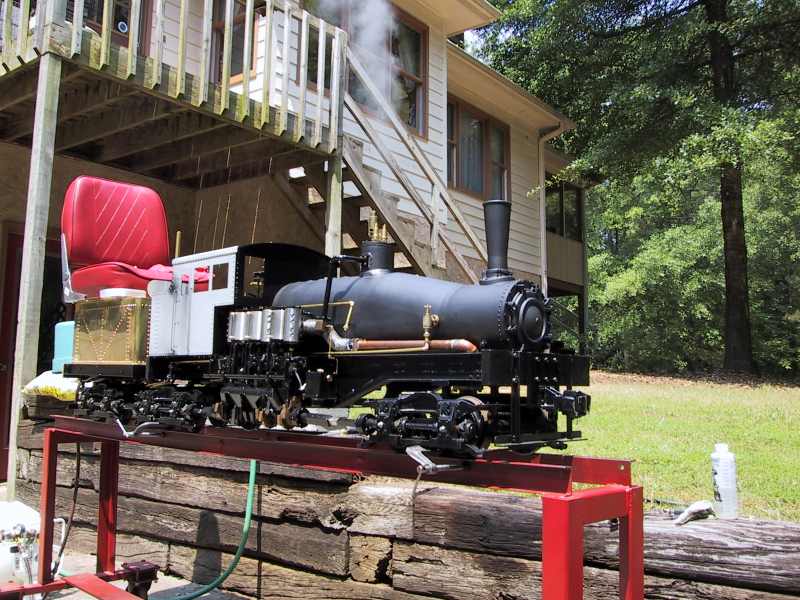
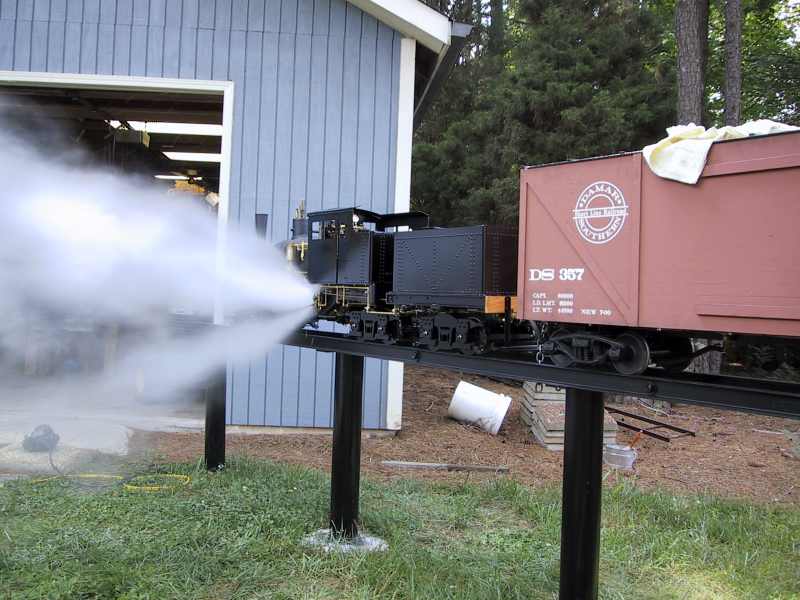
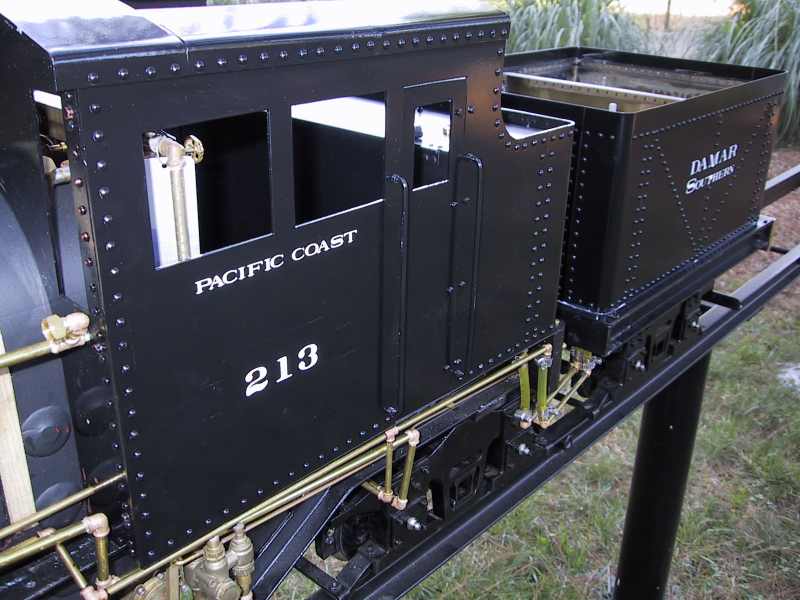
First Run Day!!! (Dated:05/31/2002)
The day has finally arrived. While not completely finished (lots of cosmetics to do yet!), the Shay was made ready to run on Memorial Day. A run day was planned at the Fairfield track and we had among the guests, special visitors from Florida, Tom and Blanch Hill. Tom is an Amtrak engineer that I met several years ago at MidSouth and is a long-time friend of Wayne and Barbara. The Shay was almost ready anyway but it took a few extra hours of prep to make her steam-worthy in time for the run. The tender tank was finally water-tight and the plumbing for it was completed enough to be safe to run. So she was ready.
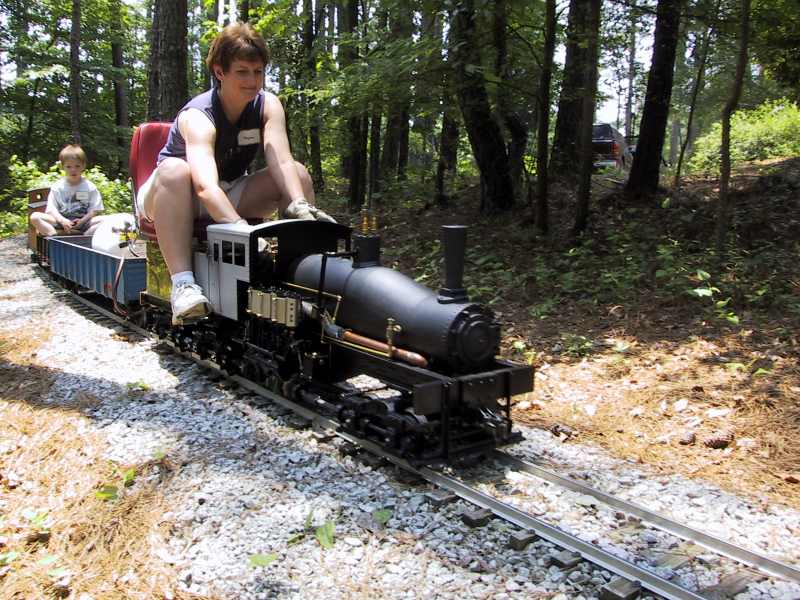
The weatherman cooperated on Memorial Day and gave us a great day to run trains. After a little thinking, we figured out a way to unload the Shay onto a rolling stand. I figured we better do the initial firing on a static stand to see if she would even pass that test before we went to the trouble to get it onto the track. After getting Wayne’s Pacific all situated and fired, I started the preparations on the Shay. I checked and double-checked everything and finally lit the fire with Wayne running the video camera. It sounded great!! A few minor leaks were detected and fixed as the heat (and pressure) increased. Finally a safety valve popped and she had a full head of steam. Everything still looked good so we shut down the fire (LP is great!), loaded her into the pickup, and got her on the track. The fire was re-lit, a couple of cars were cut out of the Pacific #169’s consist and coupled to the Shay, and I started out onto the mainline. Everything worked great all day. I tightened a few bolts here and there (we lost one minor bolt that I replaced) but she worked fine.
After we had run her a while, we were sitting on the mainline with the Shay in front (and her two cars) and the Pacific (and its consist) right behind her. We decided to see what she could do so we coupled the Shay to the front of the Pacific to make a long train (8 cars and 2 locomotives total). We filled the train with people (9 of them), put the Pacific in neutral and opened the drain cocks, and signaled to leave the station. I opened the throttle a little on the Shay and she started to roll forward without any slippage. It was fantastic! I could not believe it but she was pulling the whole consist, without any trouble, up the grade on the far end of the loop! We estimate that there was about 3500 pounds of cargo (people, cars, and locos) behind her and she pulled it fine! What a day! Everyone that wanted to got to run her as the day progressed until at about 4:30 I decided to shut her down and get ready to load her up.
Here are a few pictures of her on the day before the first run and on Memorial Day. Enjoy!
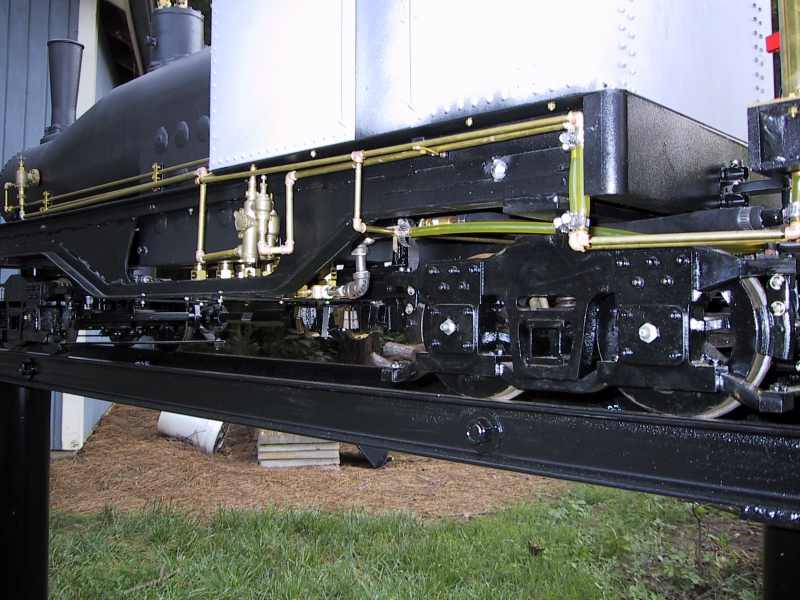
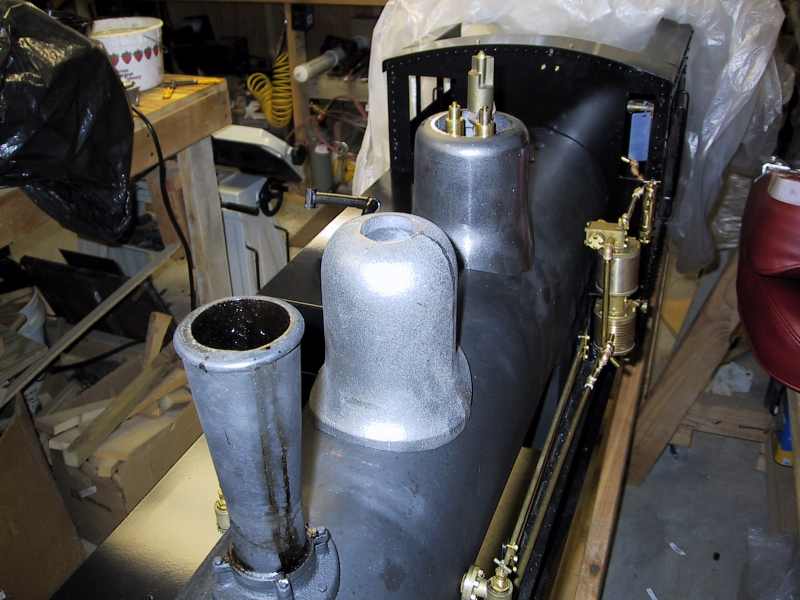
Work Continues…Details…Details…Details (Dated:08/15/2002)
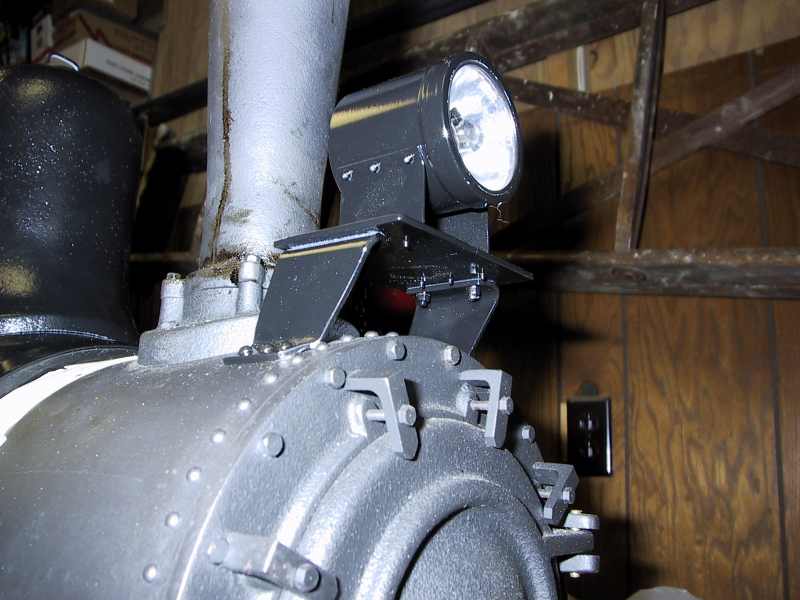
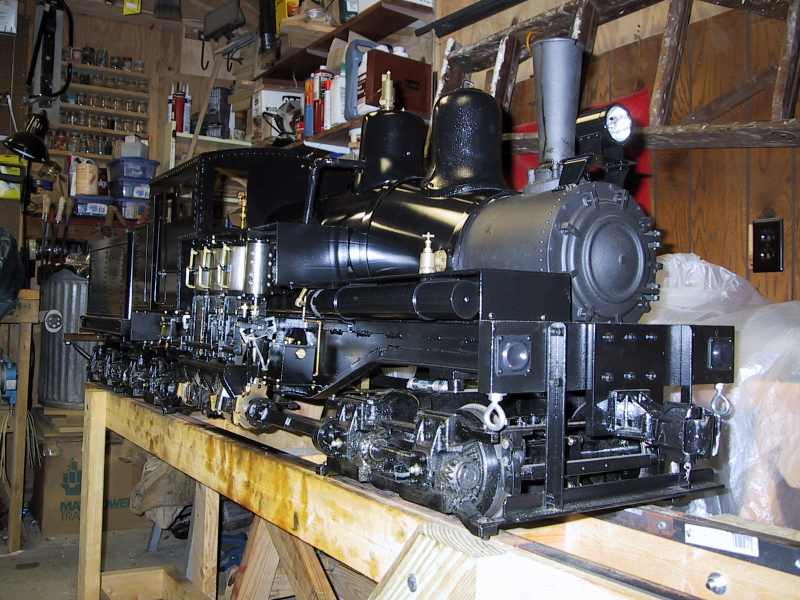
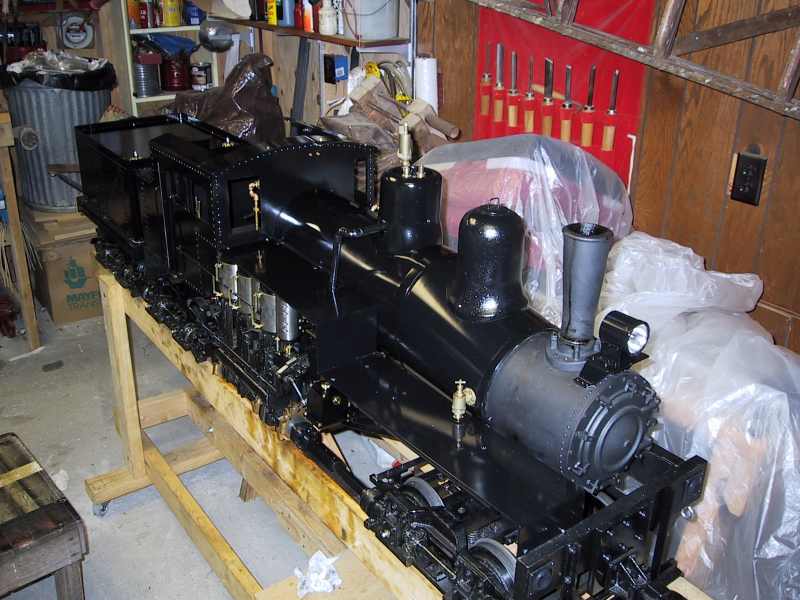
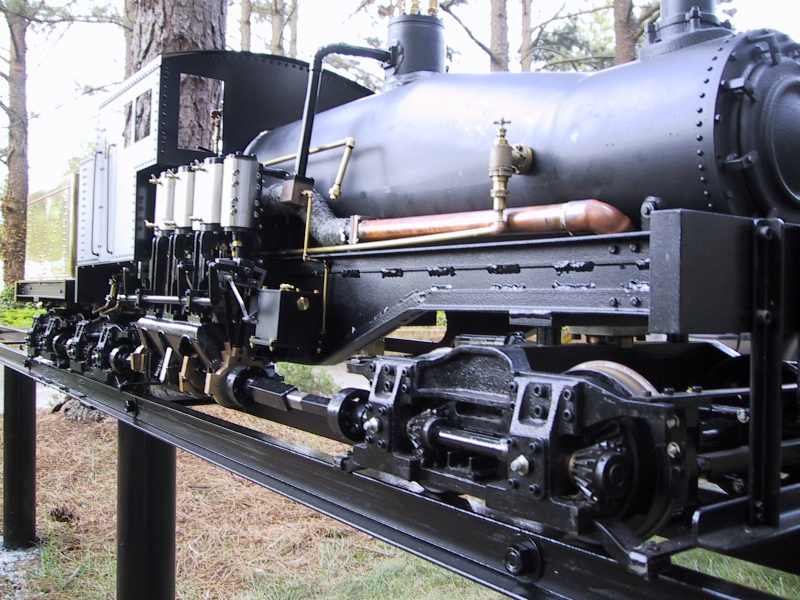
The day of the first (and second) runs have come and gone. The Shay has been partially dismantled as I continue work on applying detailing. It takes a lot of time but I believe it makes a much nicer looking locomotive. After all, part of the fun is making the scale details and having a locomotive that not only runs well but looks great too. I have included a few photos of the finishing work…still more to do!

Work Continues…(Dated:09/1/2002)
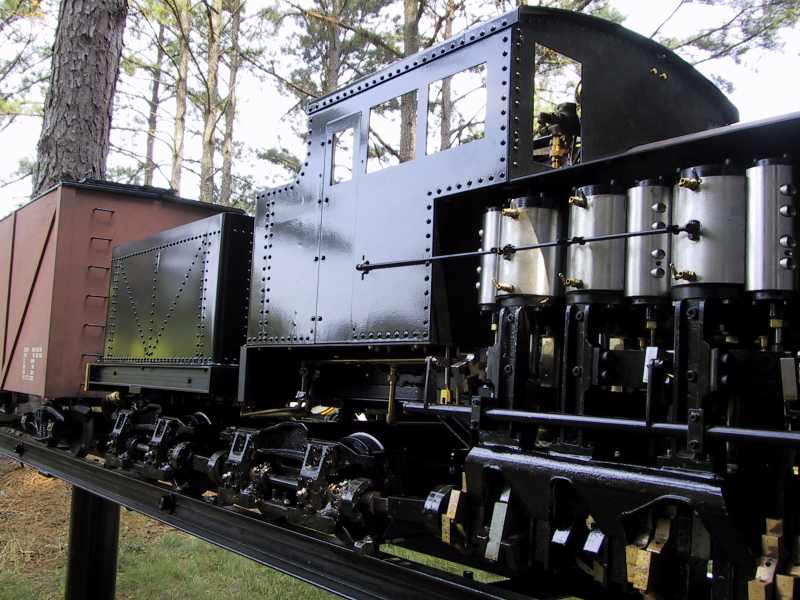
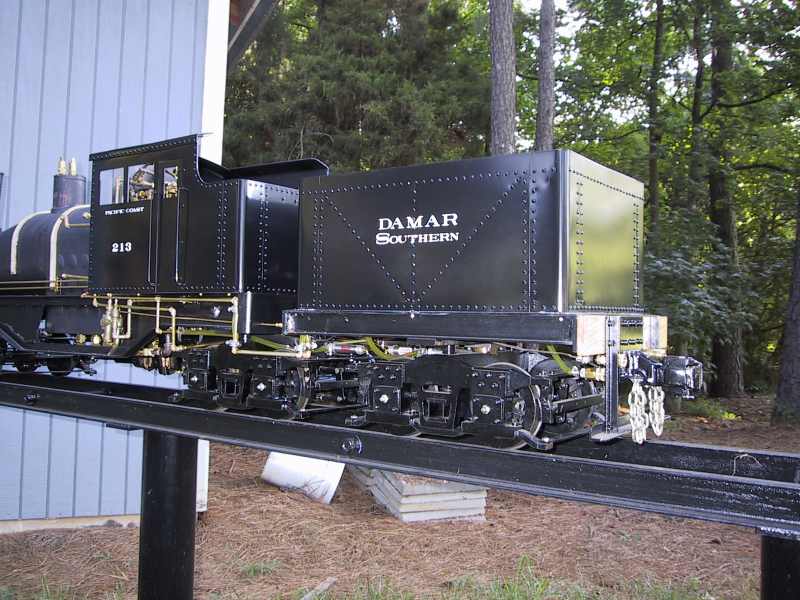
Most of the detailing is finally completed. There are a few things that I want to add in the near future but the bulk of the work is done. The boiler jacket is complete, the steam domes are done, and the lettering has been applied. Everything is assembled (again) and ready for running on Labor Day.
Here are some of the newest photos.