Dateline: November 2002
Its time to start another project. The Shay is all done (except for periodic maintenance!) and the unit train riding cars are coming along nicely. So what’s next? Then I remembered the start of a Climax locomotive in the basement of a friend. It was an odd size and I had no clue what condition it was in or what it should look like when completed. So I contacted my friend and asked her if she would sell it to me. She agreed and now I have the start of a Climax loco to finish.
I got the model home and did some measuring to see what I had. The trucks have a gauge of 2.125″ which is pretty odd. The model appears to be in 1:14 scale (about 7/8″ to the foot). This too is rather odd. But alas, when you find them already started you just go with what you have.
Initial Condition
The initial state of the model wasn’t too bad. Obviously a lot of work remained to finish the model but the parts that existed were in fairly good shape and showed a great deal of skill in the construction. The pair of gear-driven trucks were assembled and did roll but not too well. The drive shafts that connects the read truck to the center gear drive unit was broken off; but I have the piece. Likewise, the rear truck was damaged from an apparent drop onto the floor and would require some soldering to repair. The engine mock-up would turn but was very balky and would need some work. The water tank was showing the distinct signs of storage with some minor chips and cracks.
Target
I did some research on the web to try to gain an understanding of what the loco should look like when completed. It was there that I learned that this was a model of a Class A Climax. The Class A is the earliest versions of the Climax loco and not many were actually built. Here is a picture of what I will try to make my loco look like:
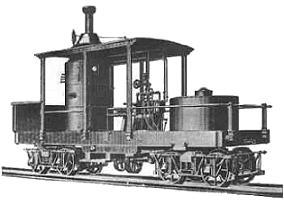
Prototype
The model is constructed to run on a brass track and pick up DC current from the track. The fake water tank conceals a 24V DC motor that is connected to a worm gear box under the loco that provides the motion to the steam engine unit. The steam engine, in turn, drives a set of gears under the loco to which the drive shafts to the trucks attach.
Work Progress (Dated: 1/12/2003)
After some initial cleanup and inspection, I have done the following:
- Corrected problems with trucks. Both of them are now cleaned, repaired, and oiled and roll freely
- Brazed the drive shaft and repaired the rear-most universal joint.
- Removed, repaired, and re-installed two wood cross-members that the steam engine is mounted on. They were apparently cracked and nearly broken on two when the model was dropped at some point in time.
- Repaired the cracks and chips on the water tank and painted it.
- Tightened all the nuts and bolts all round the model. The wood has apparently dried over the years and shrunk. Many bolts and nuts were very loose.
- Inspected the 24V DC motor and gear housing. Found that the two units were coupled with a simple piece of rubber tubing. The tubing had become dry and brittle over the years and was not providing for the transmission of the motor’s torque into the gear box. I have constructed a brass union to use in place of the rubber tube. It is working great and can move under its own power when connected with a regular Gauge 1 train transformer power unit.
- Started constructing the side railings and cab that will cover the engine and boiler.
- Constructed a temporary display track using rail from my Gauge 1 railroad.
My friend found more parts to it the other day so now I have the start of the mock boiler. You can see it in the pictures that follow:
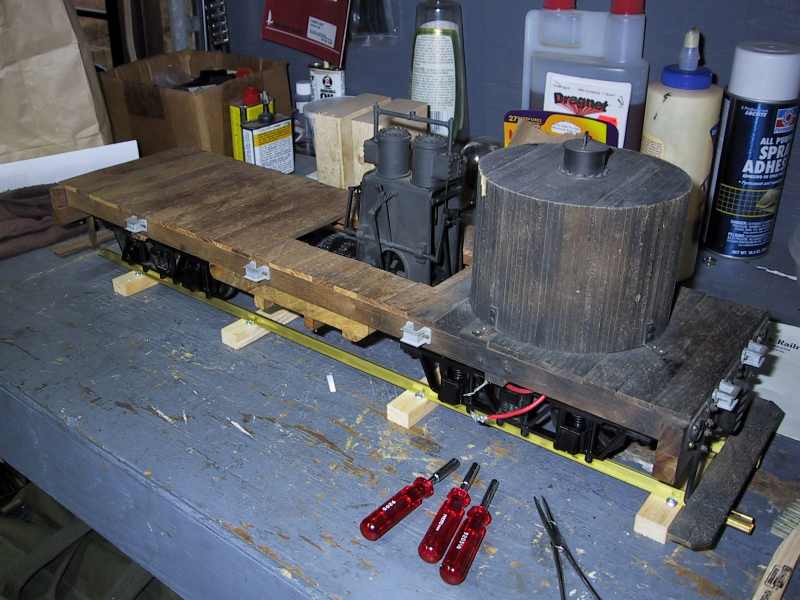
Overall of what i have to start with 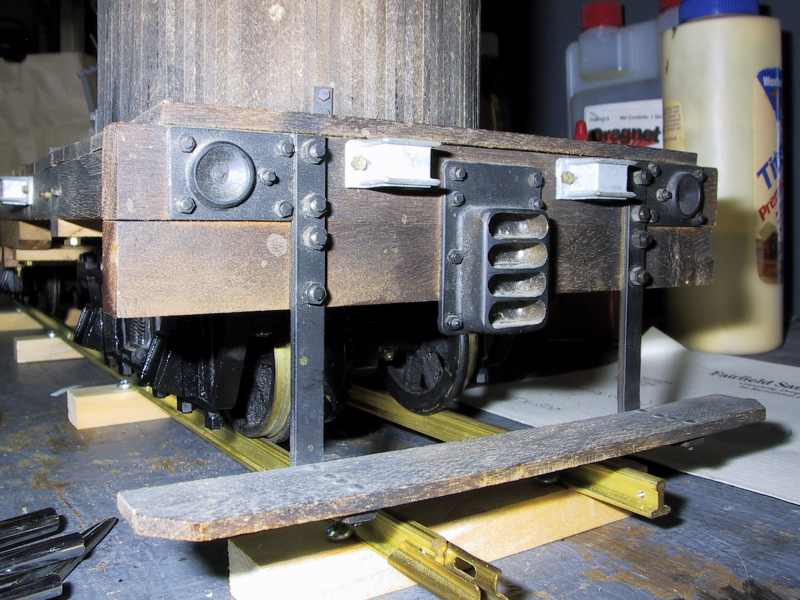
Pilot beam 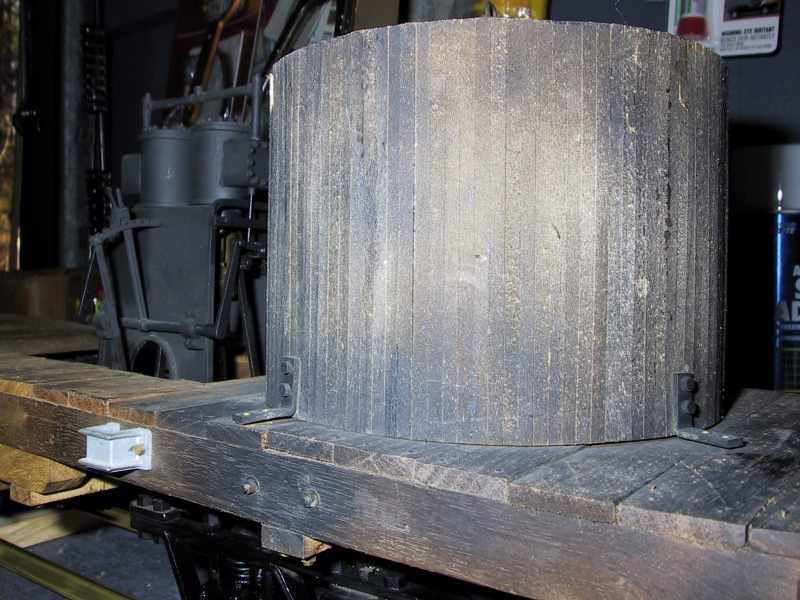
Fake water tank 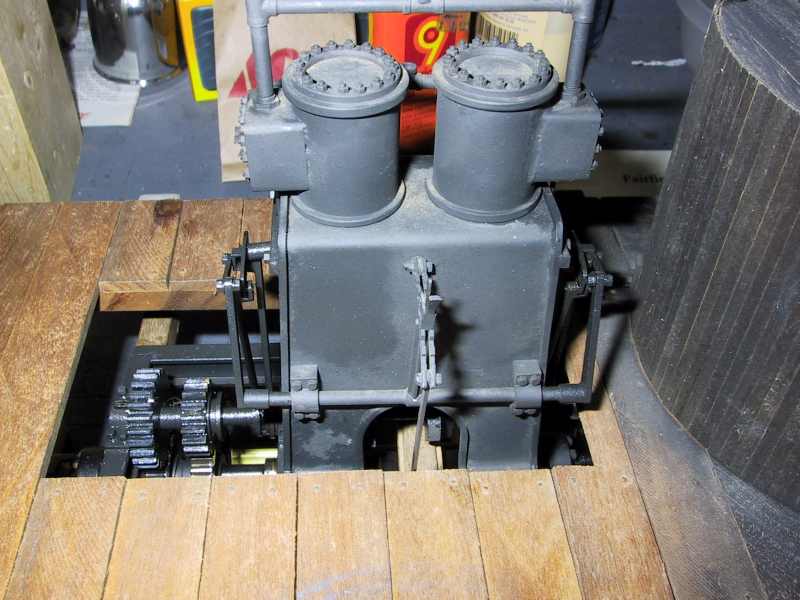
Motor 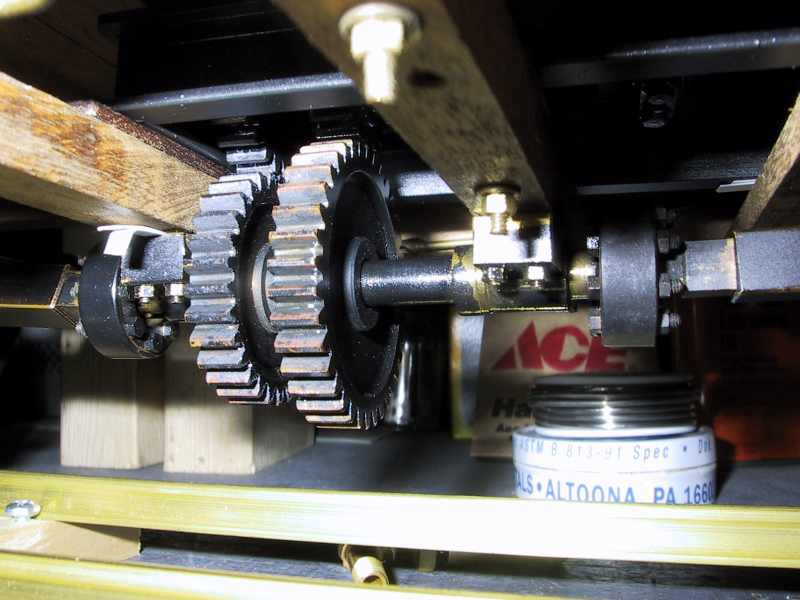
Gear drive under the base 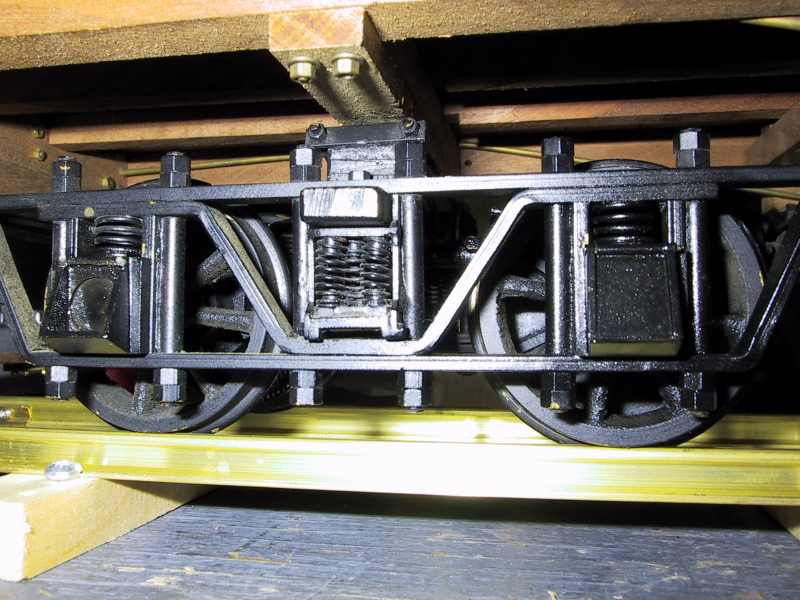
Center gear-driven truck
Work Progress (Dated: 2/1/2003)
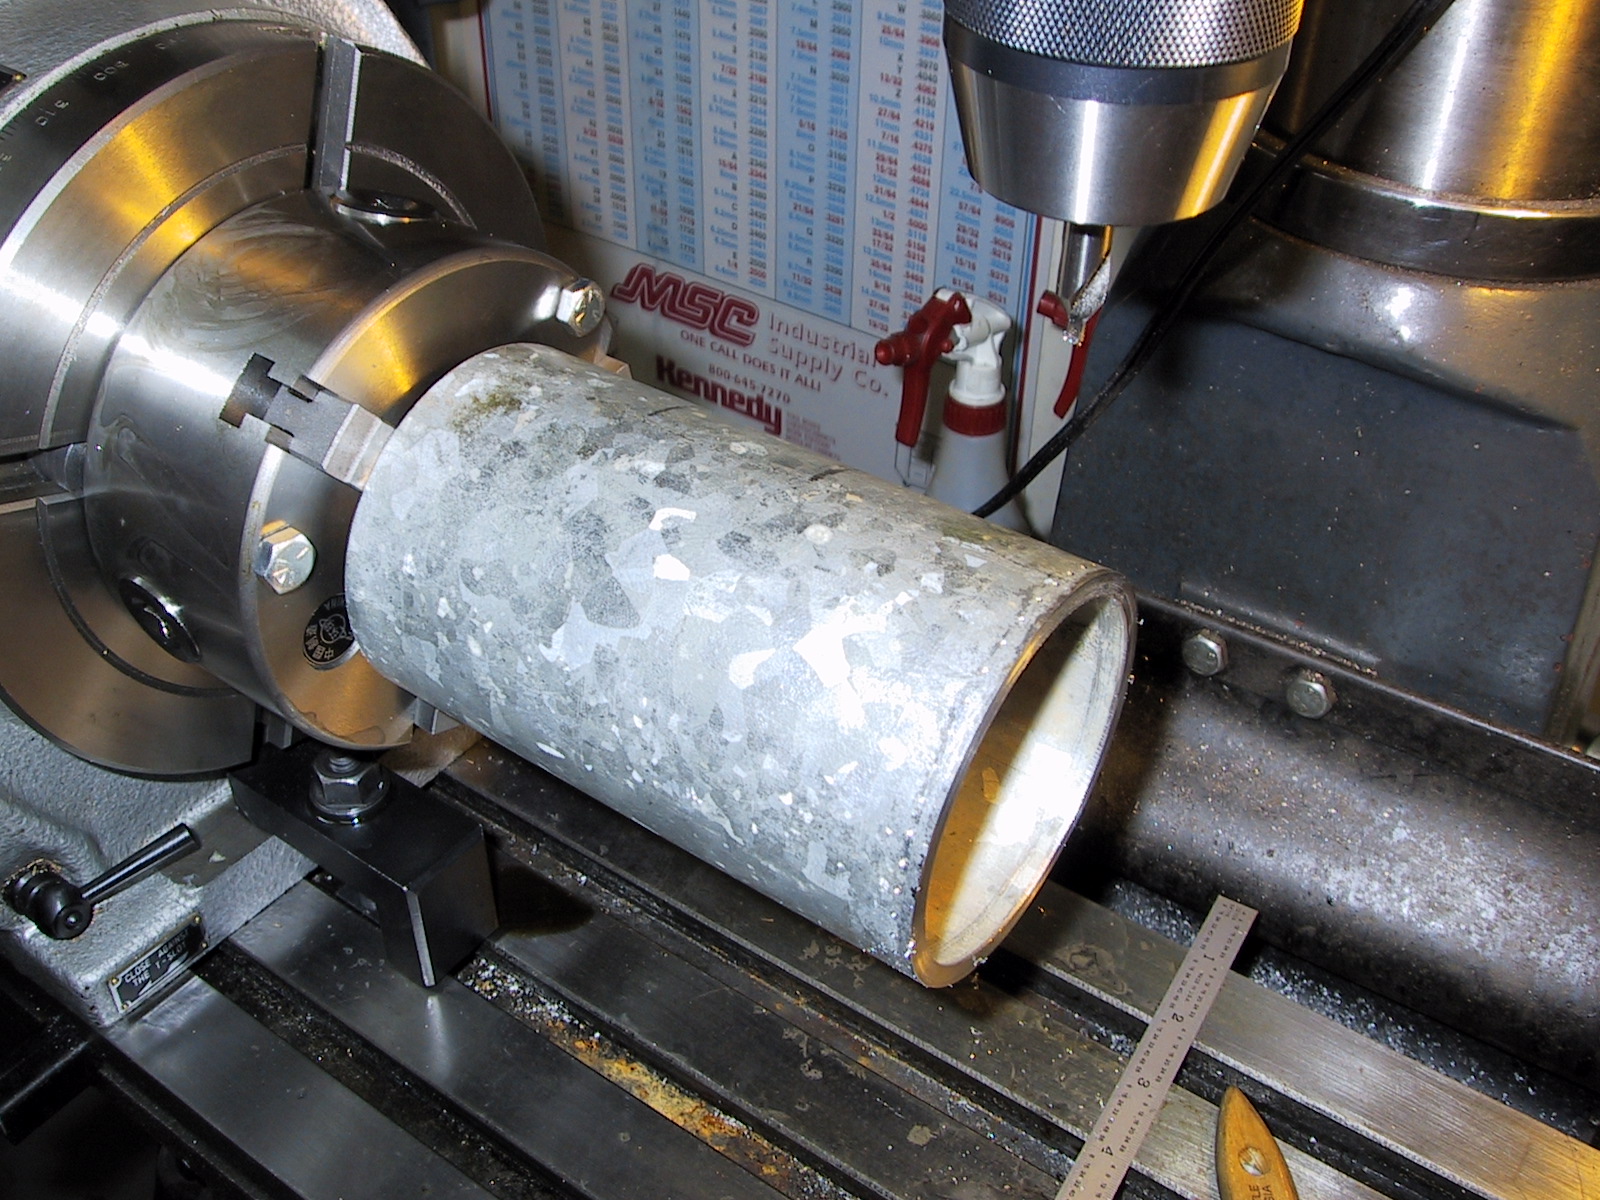
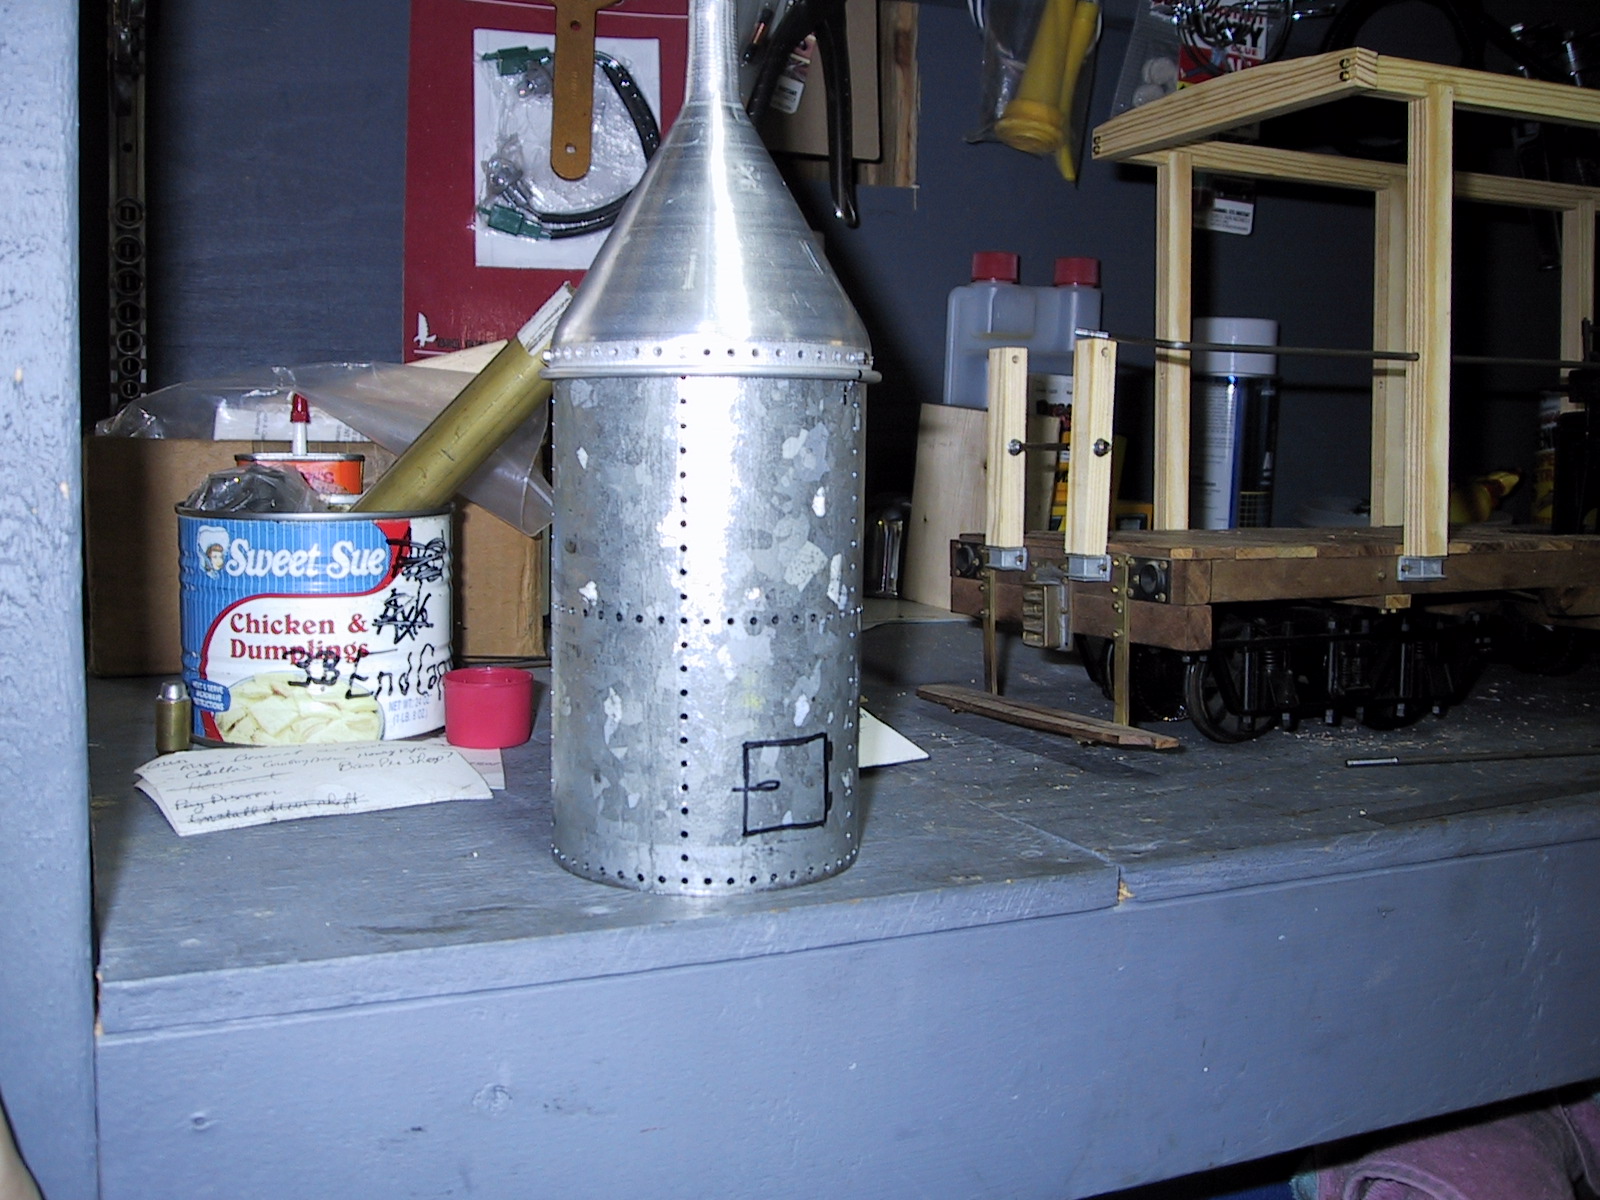
The boiler gets a start by drilling all the rivet holes.

Boiler shell mounted to rotary table for drilling
Work Progress (Dated: 4/19/2003)
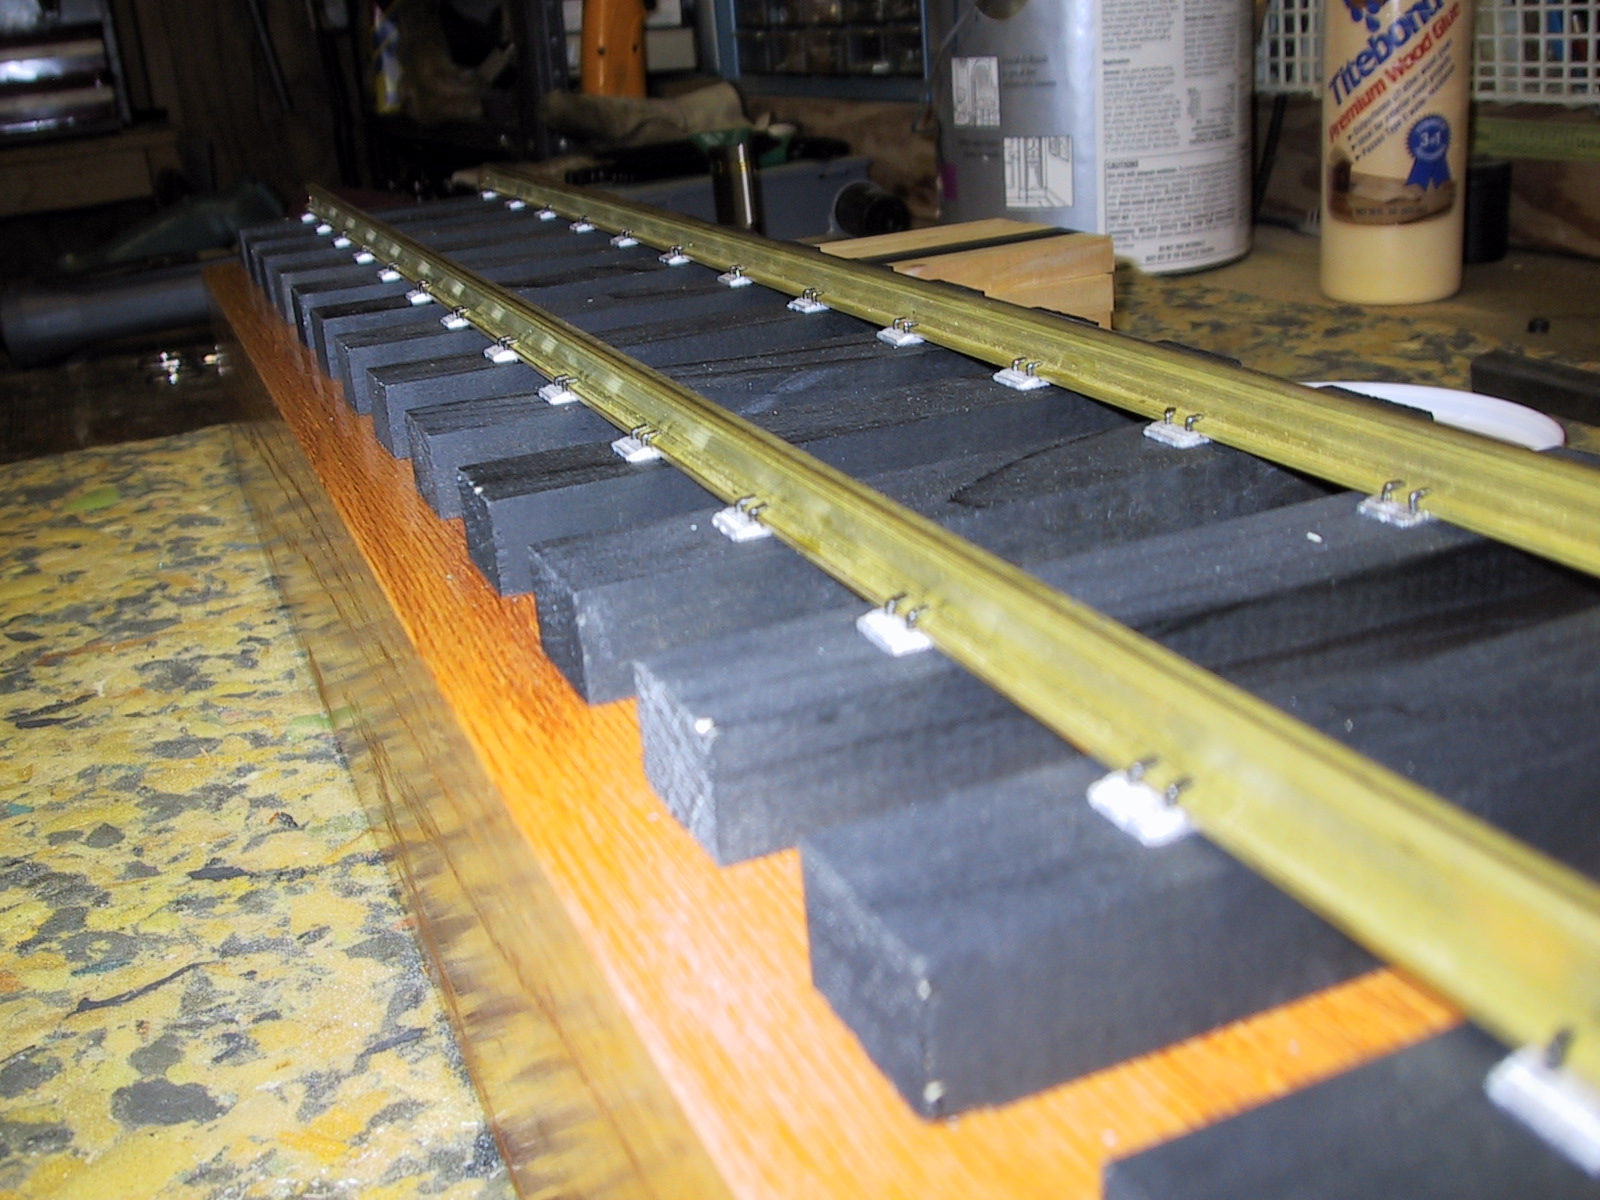
Work on the boiler continues as well as work on the display track.
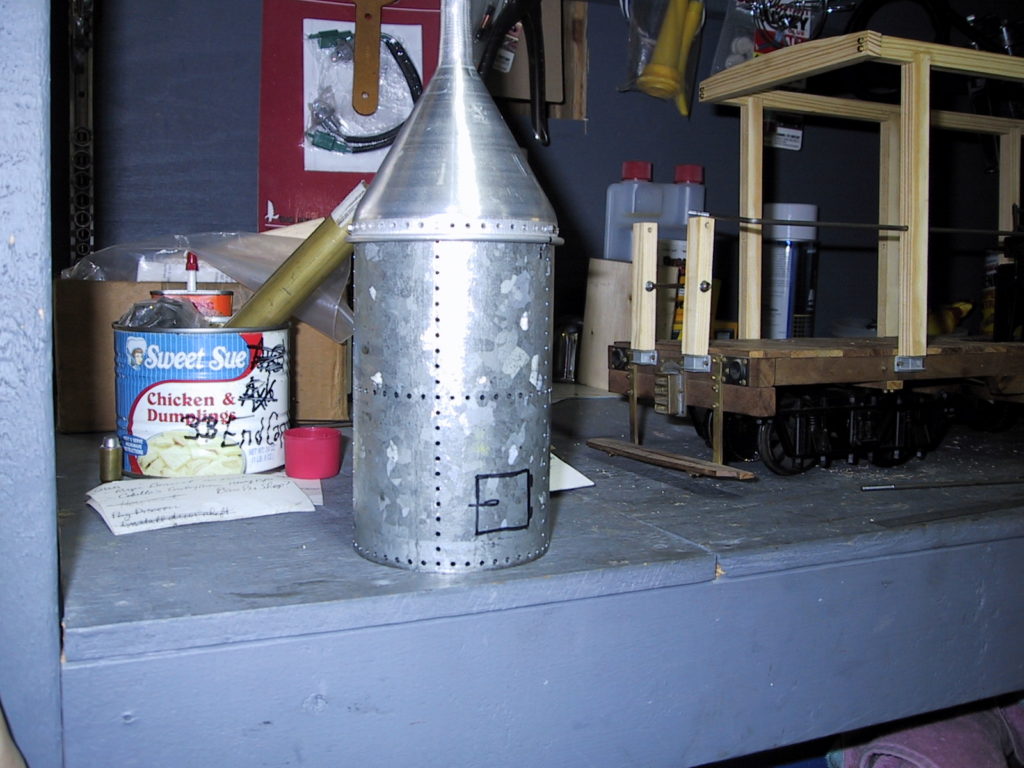
Boiler with dome and chimney 
Custom track panel for display 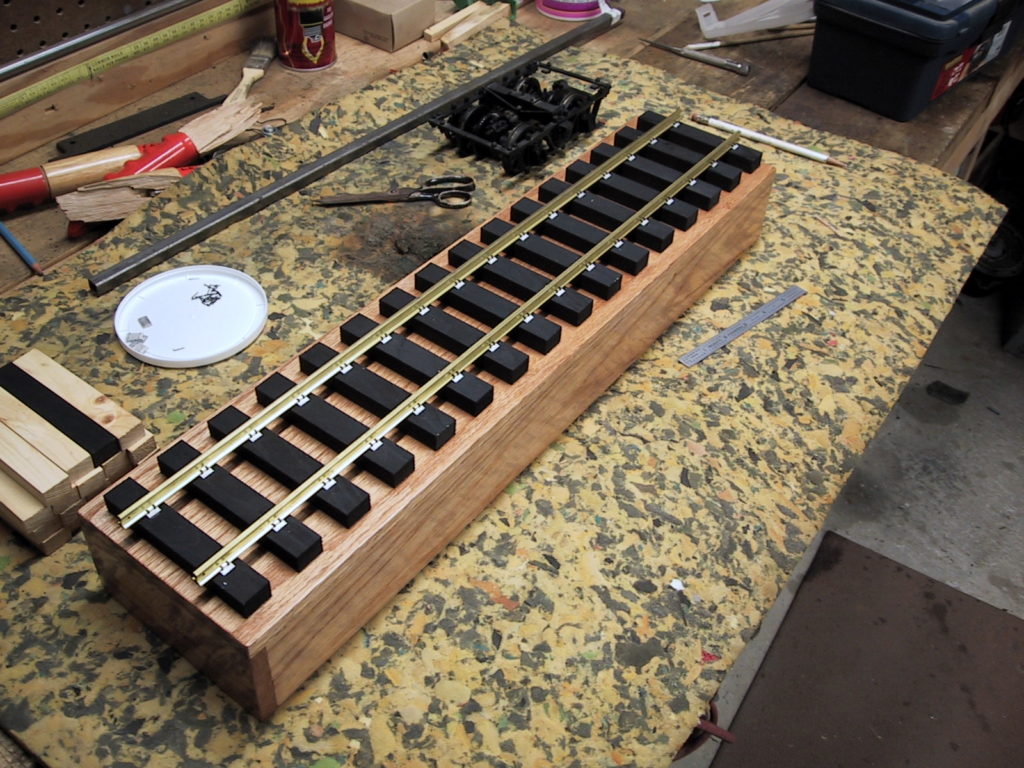
Track mounted to display stand

Work Progress (Dated: 6/22/2003)
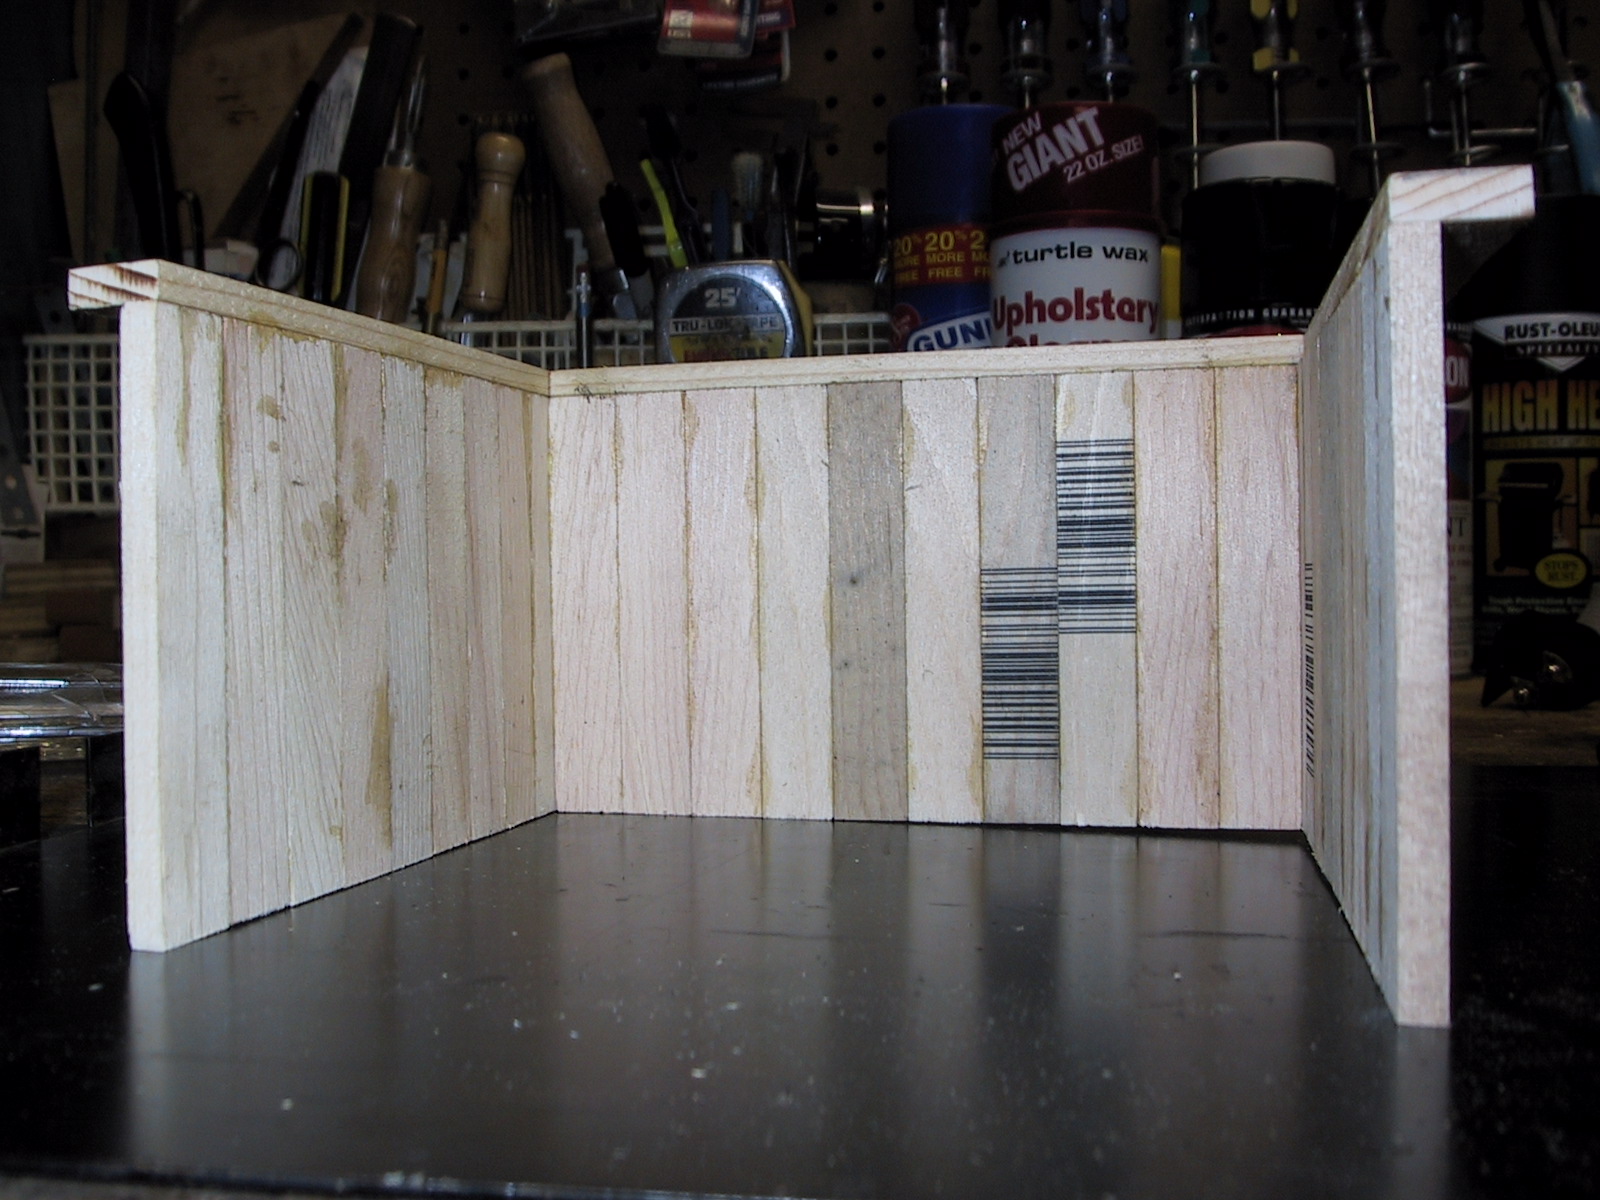
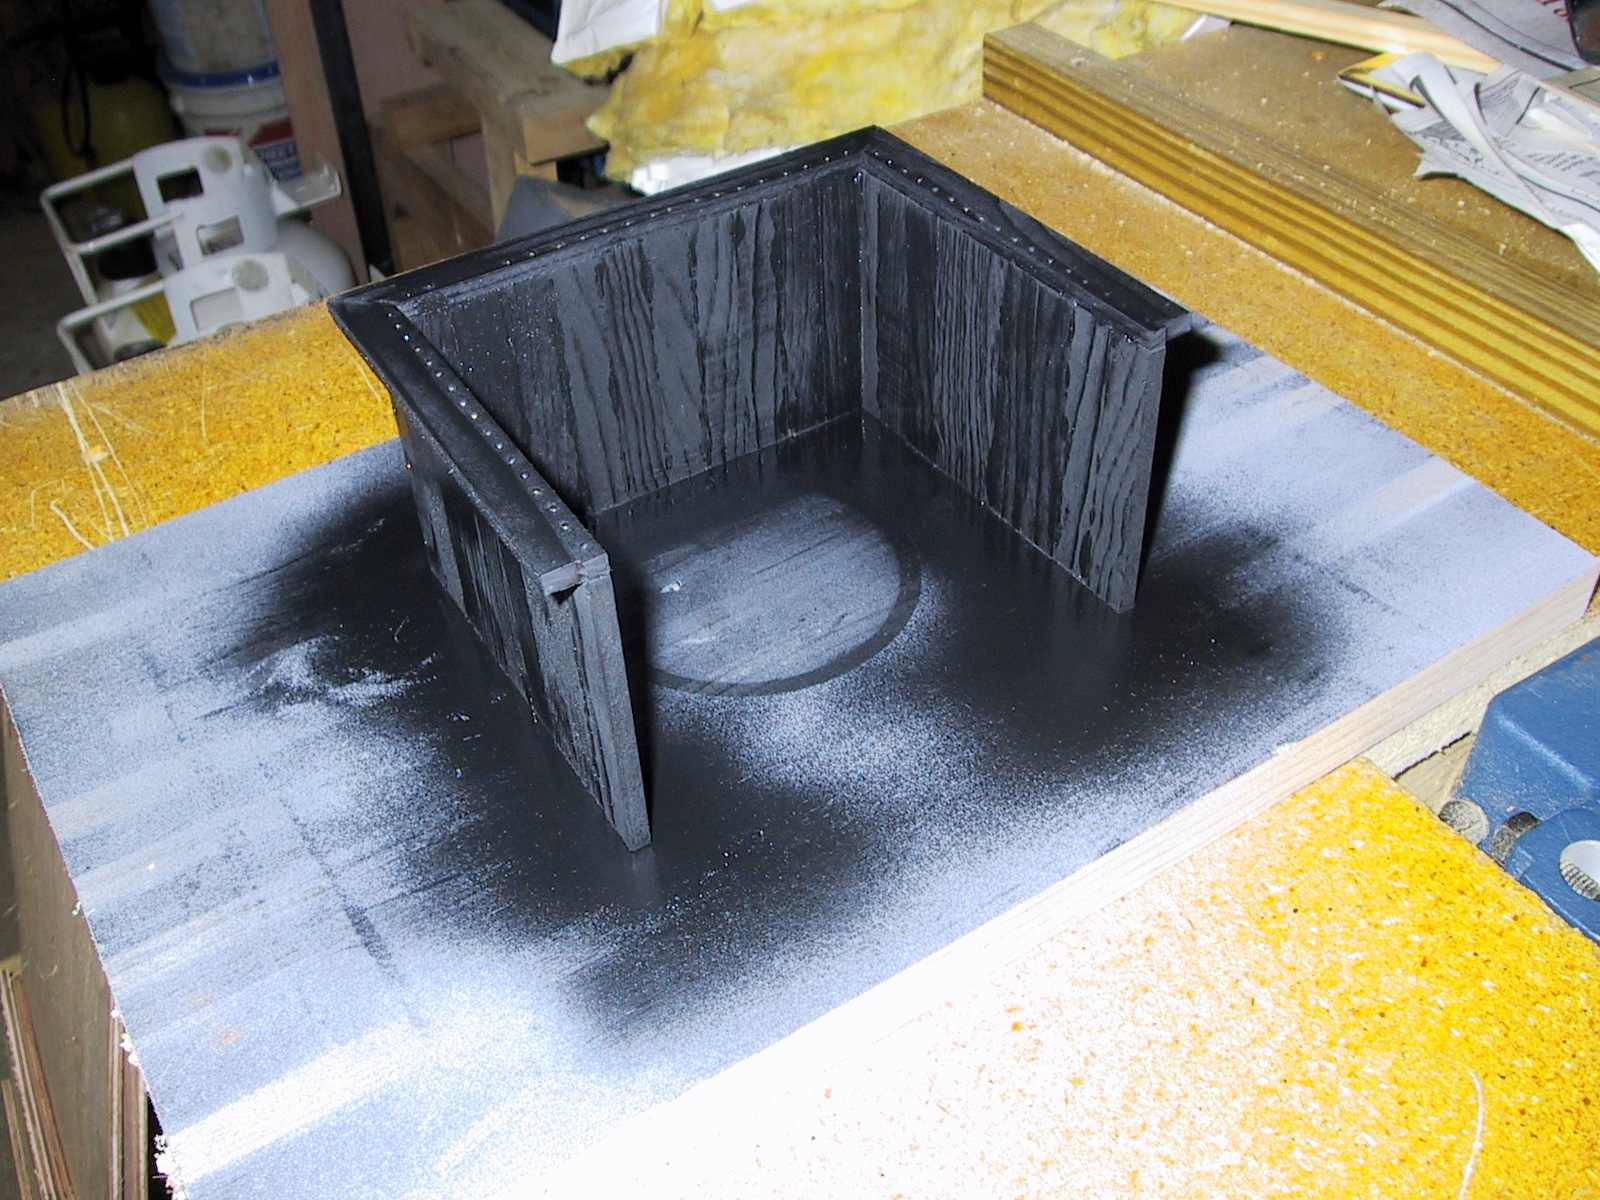
Progress continues. The super-structure has been fabricated and work on the wood box is progressing nicely.
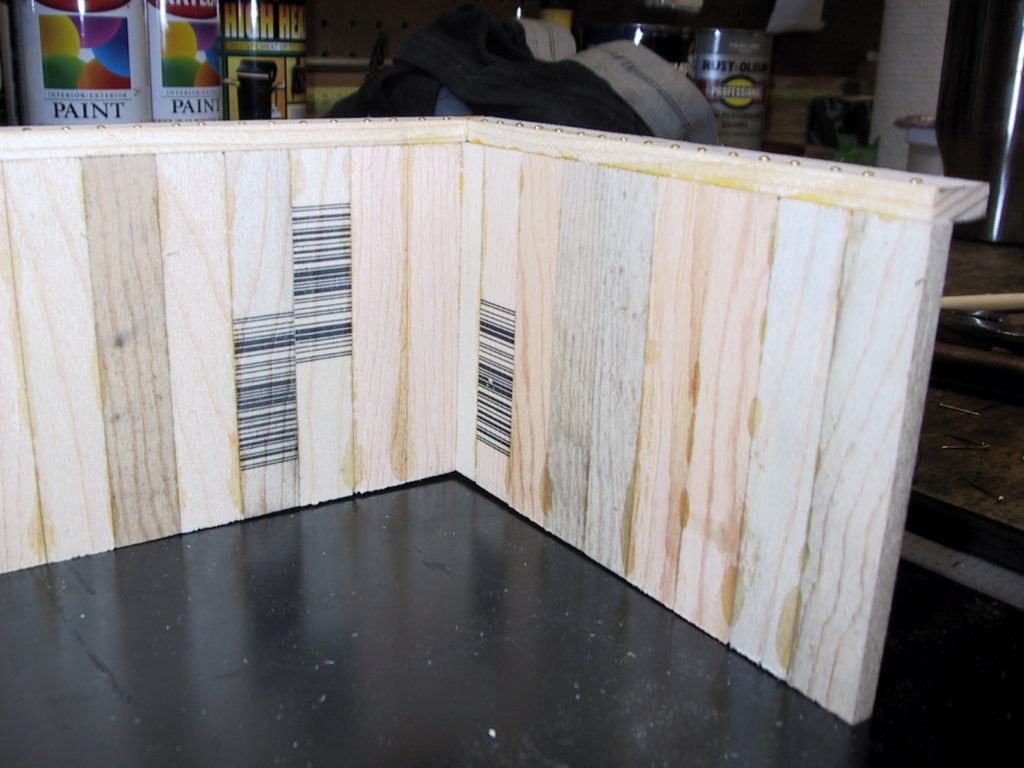
Start of walls 
Walls assembly 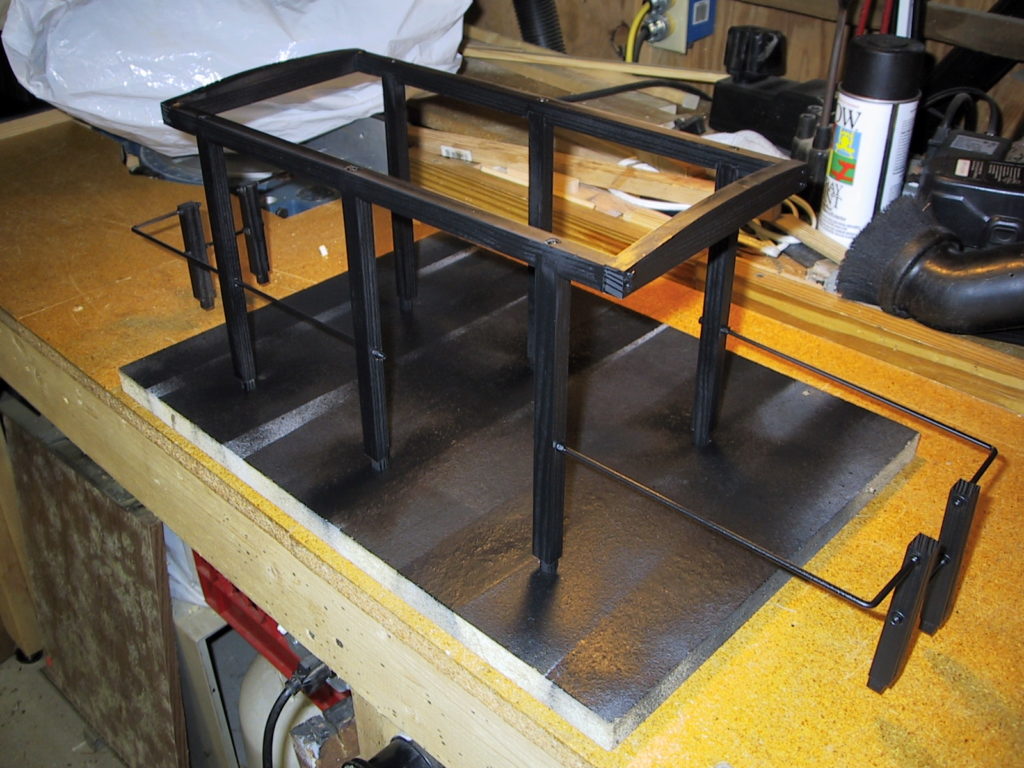
Superstructure that will have roof 
Walls get painted


Work Progress (Dated: 9/2/2003)
As work progresses on a number if things, I have completed the design and fabrication of the firebox door that will be attached to the boiler shell. Here are a couple of pictures.
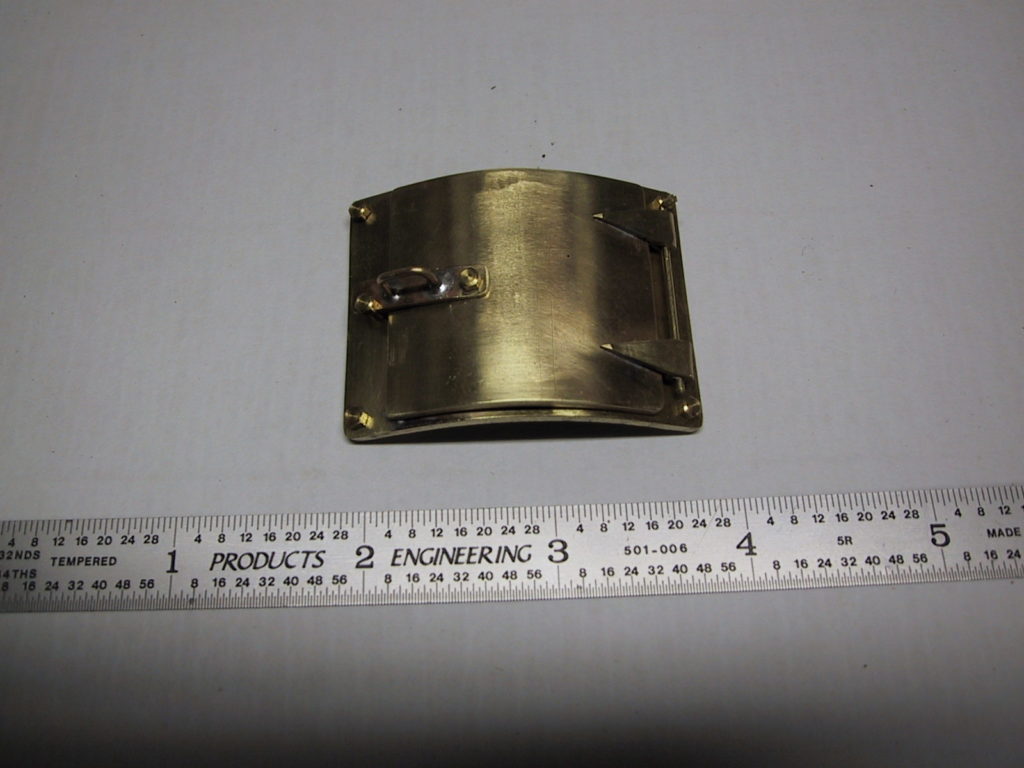
Curved firebox door 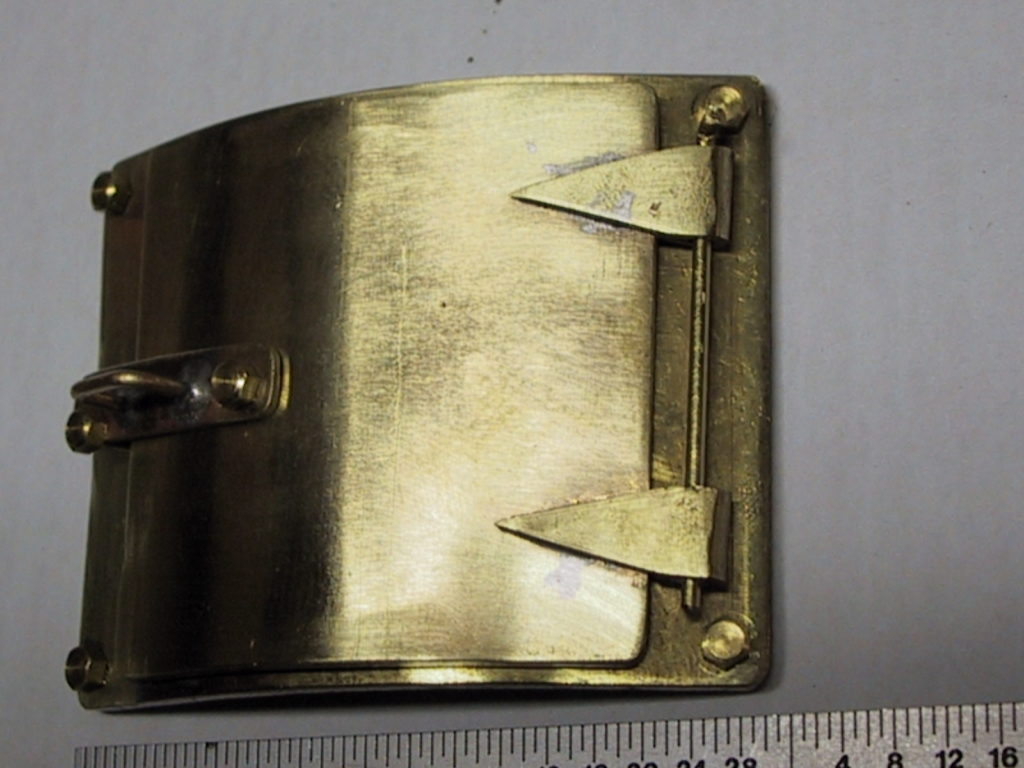
Mounted to frame 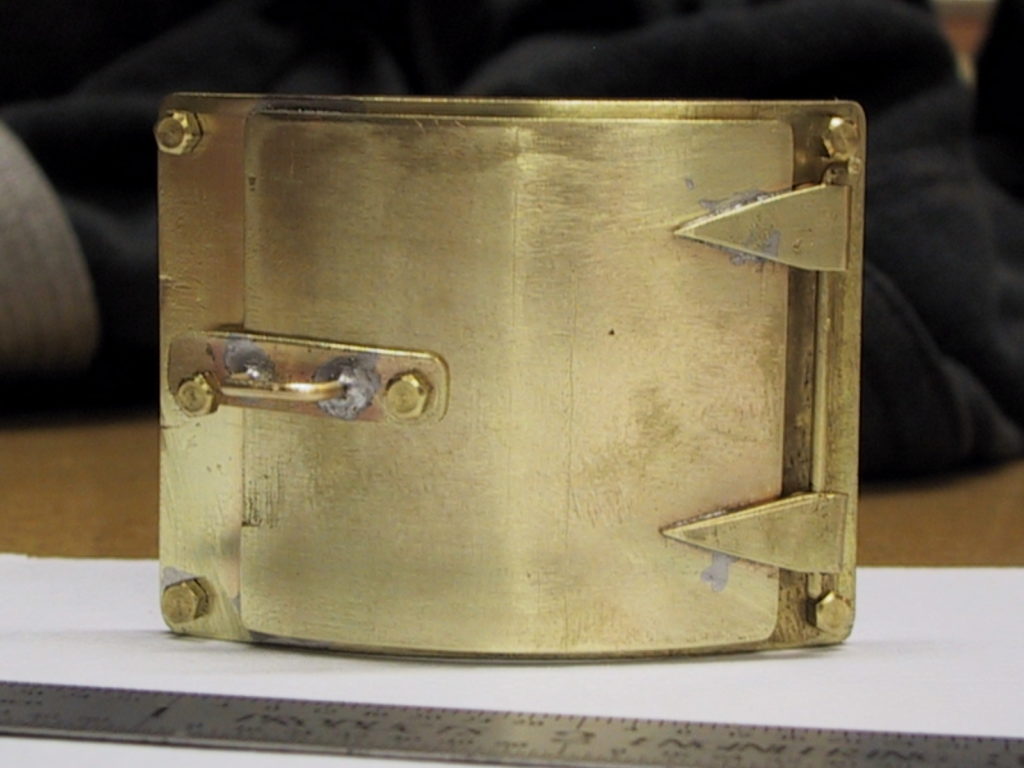
Assembly
Work Progress (Dated: 9/3/2003)
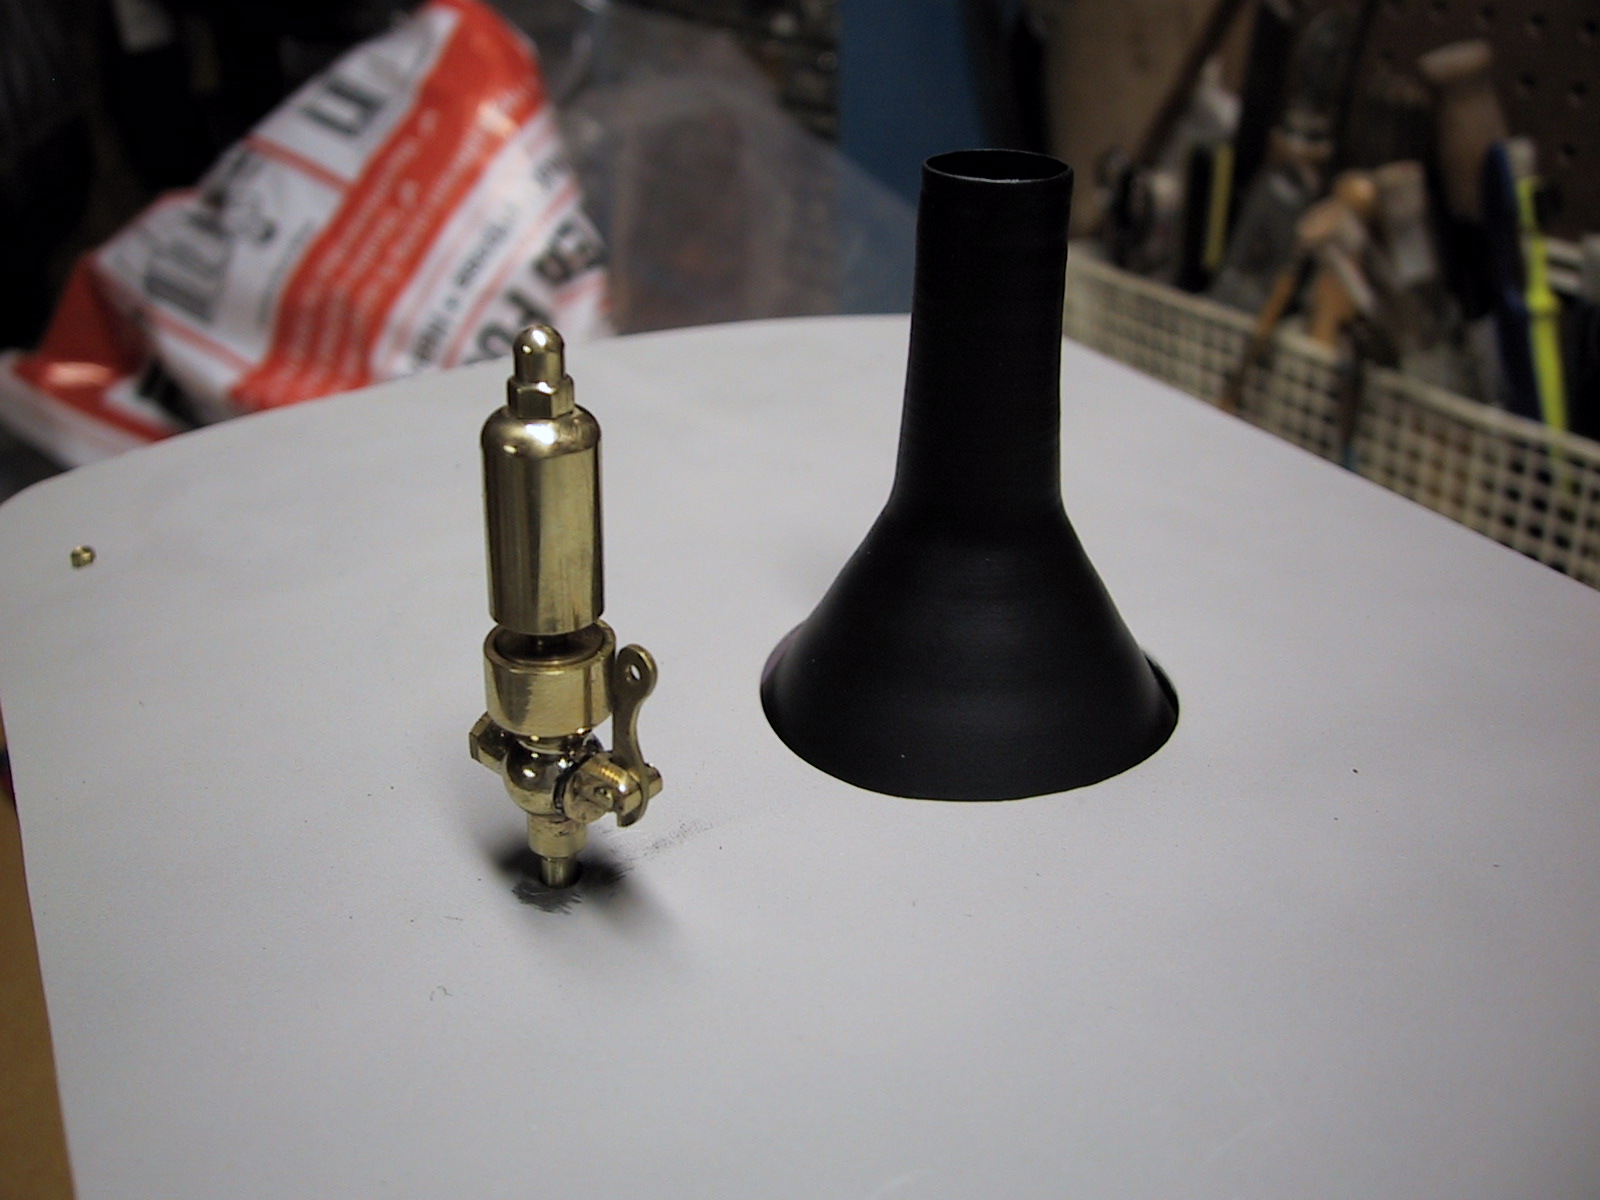
Things are beginning to come together rapidly now. As you can see from the pictures, many of the details are being assembled and the loco is starting to take shape.

Boiler mounted with superstructure 
Whistle and chimney 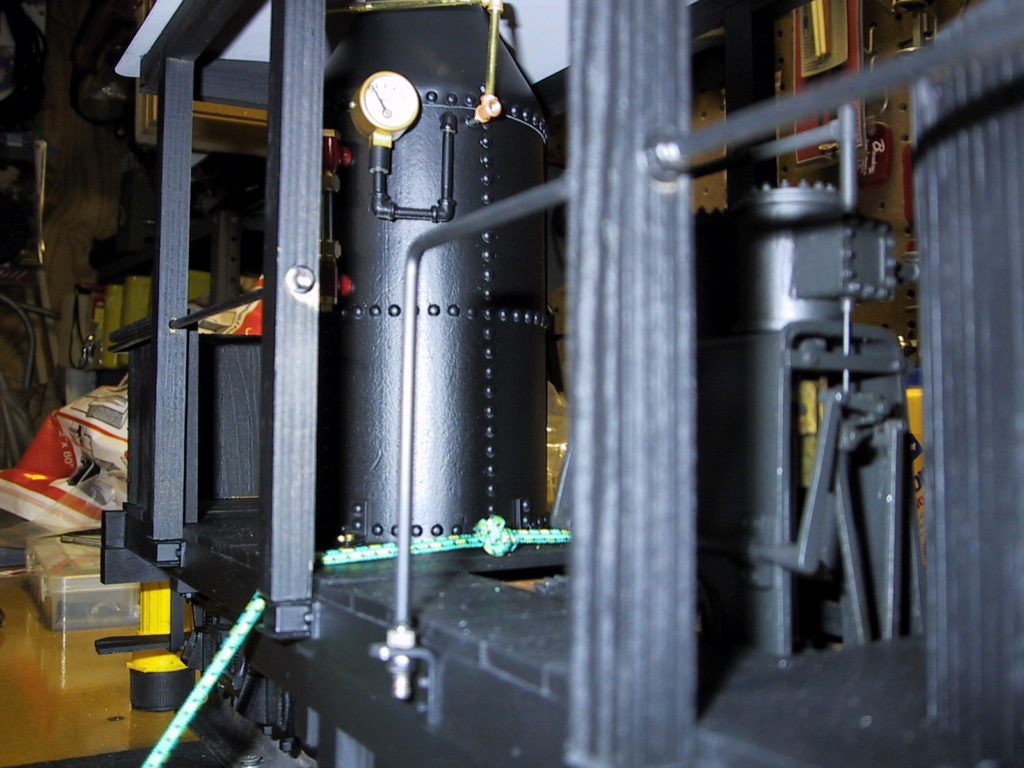
Plumbing


Work Progress (Dated: 4/3/2004)
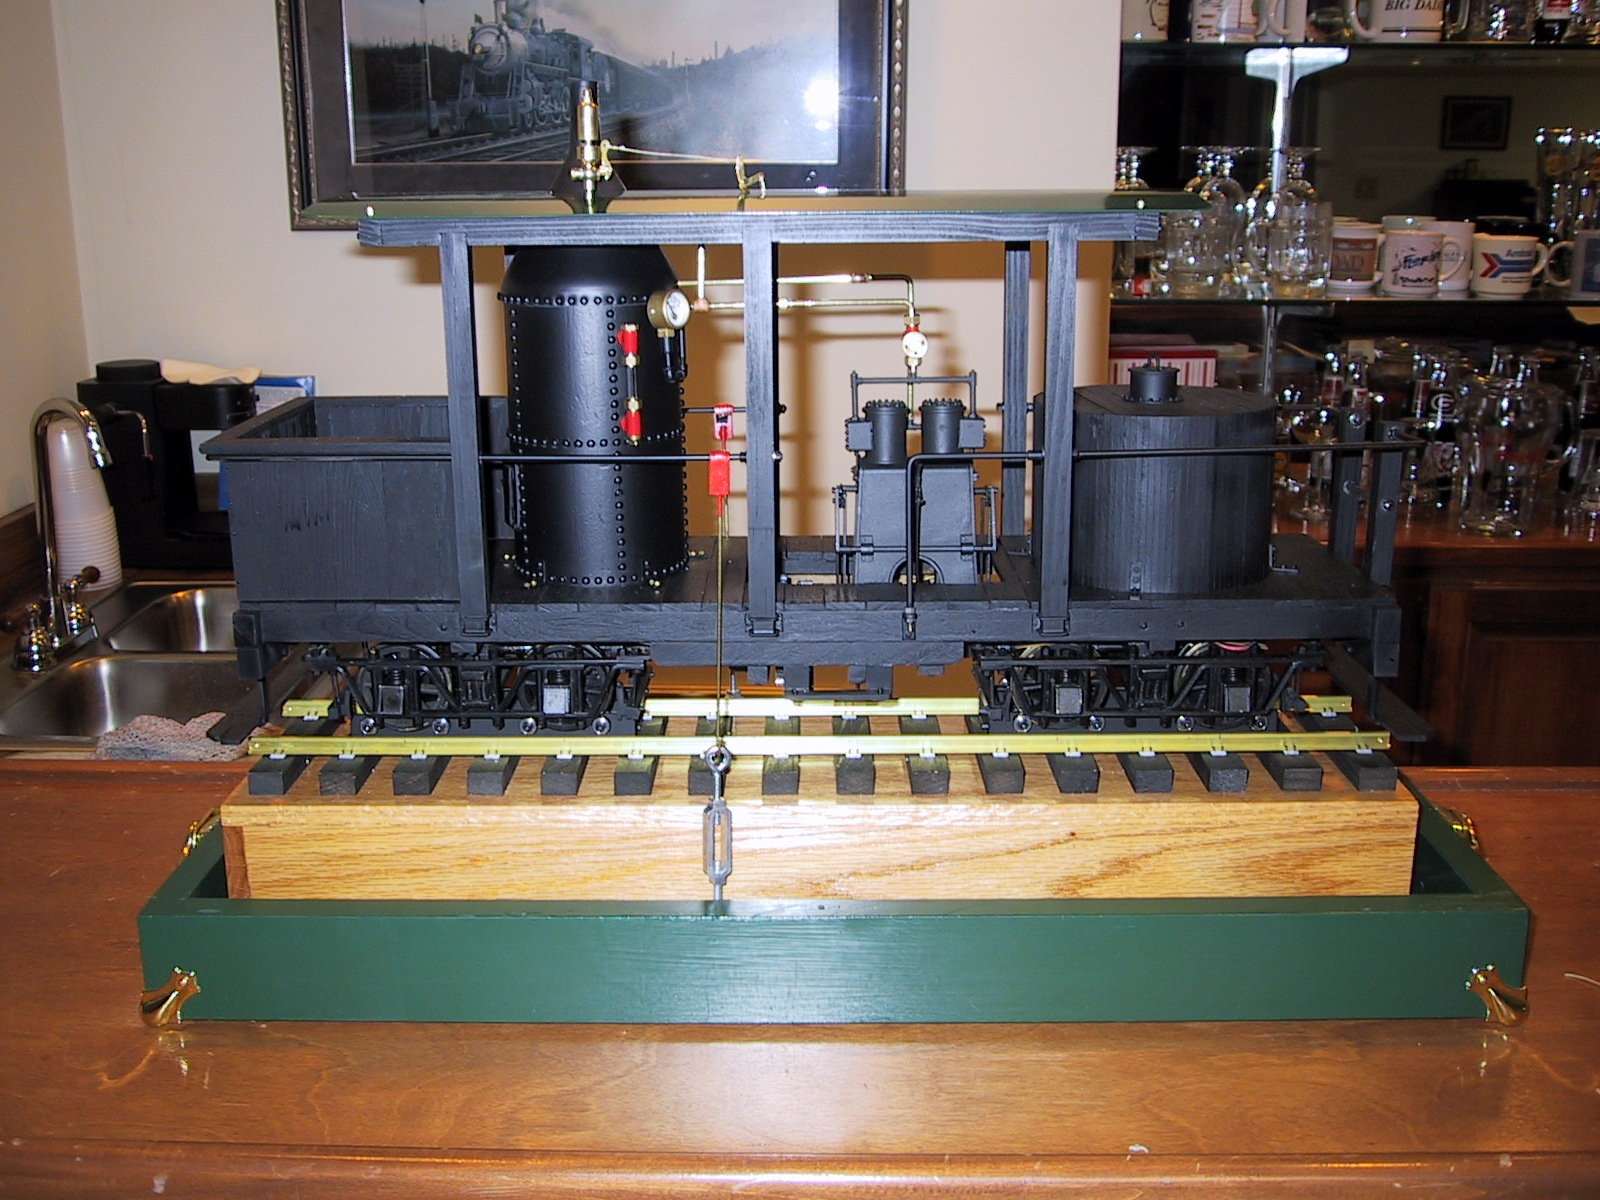
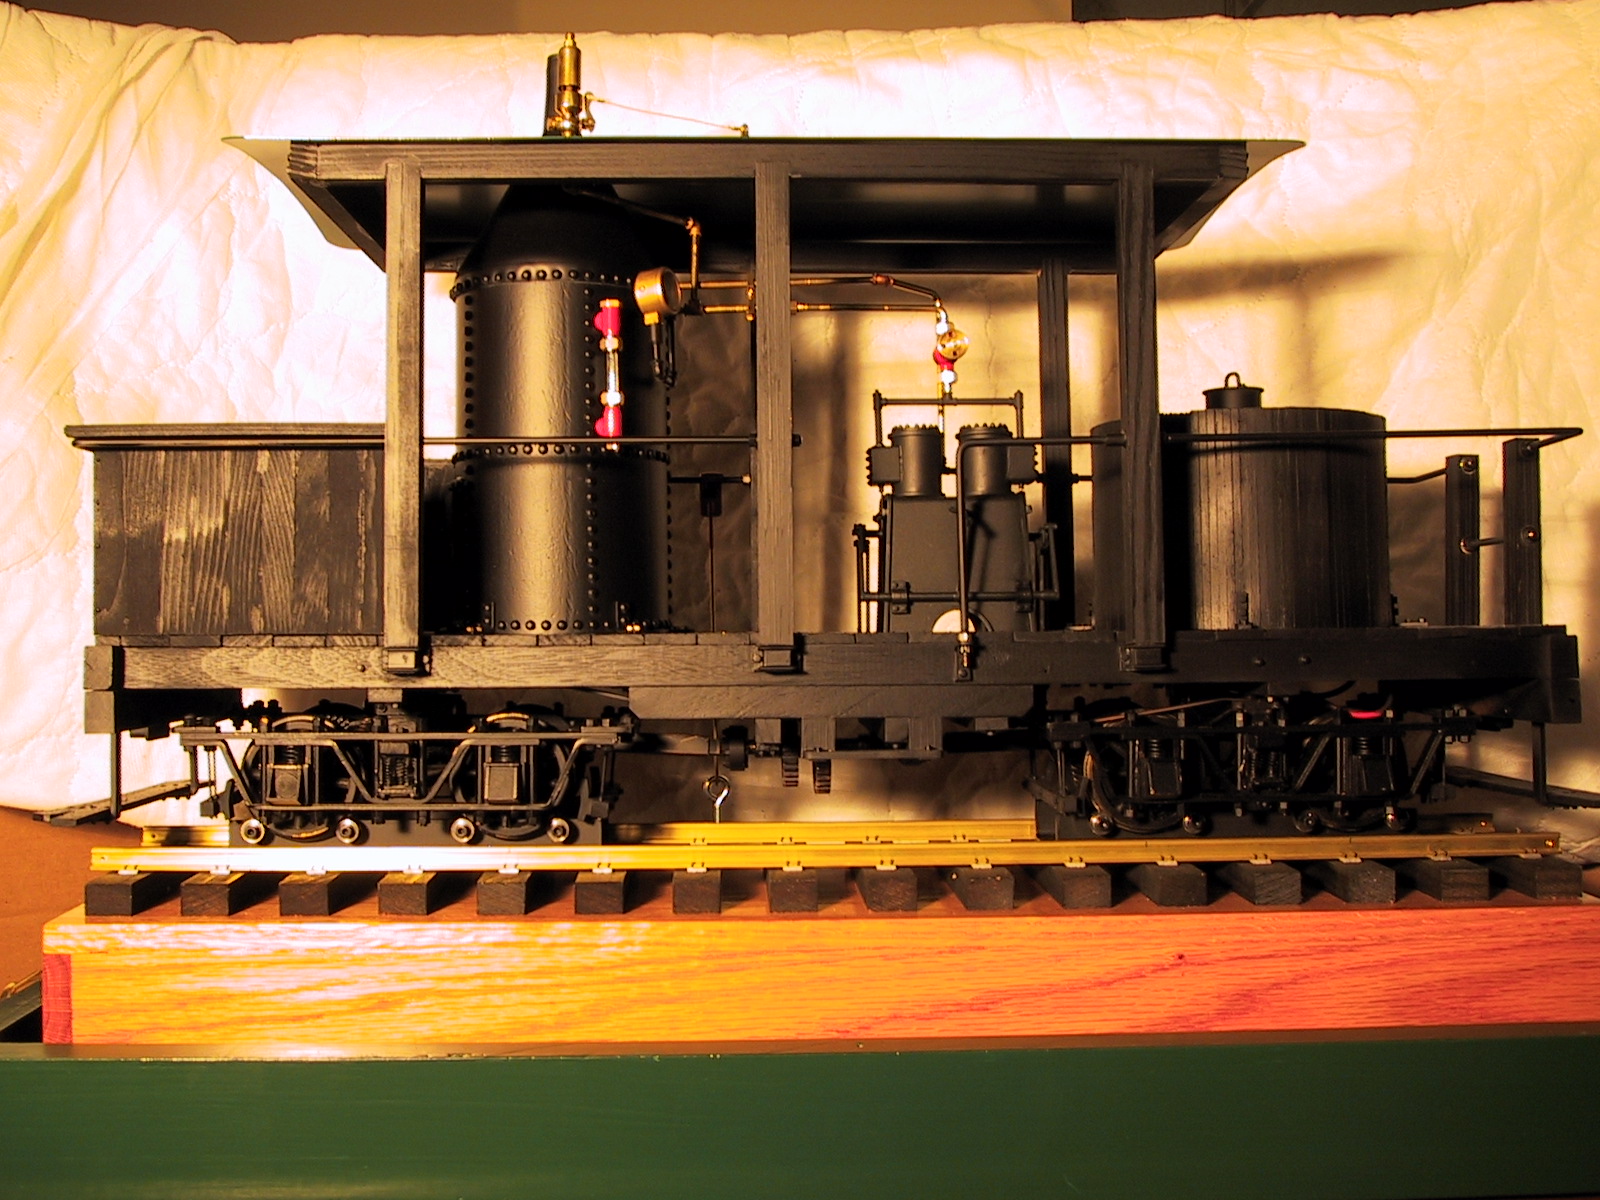
Well its been quite some time since I updated this page. The Climax is all done so its about time that I posted some of the pictures of the work progress and the final product. It came out pretty nice. It got rave reviews everywhere that I have displayed it. A worthwhile project!!
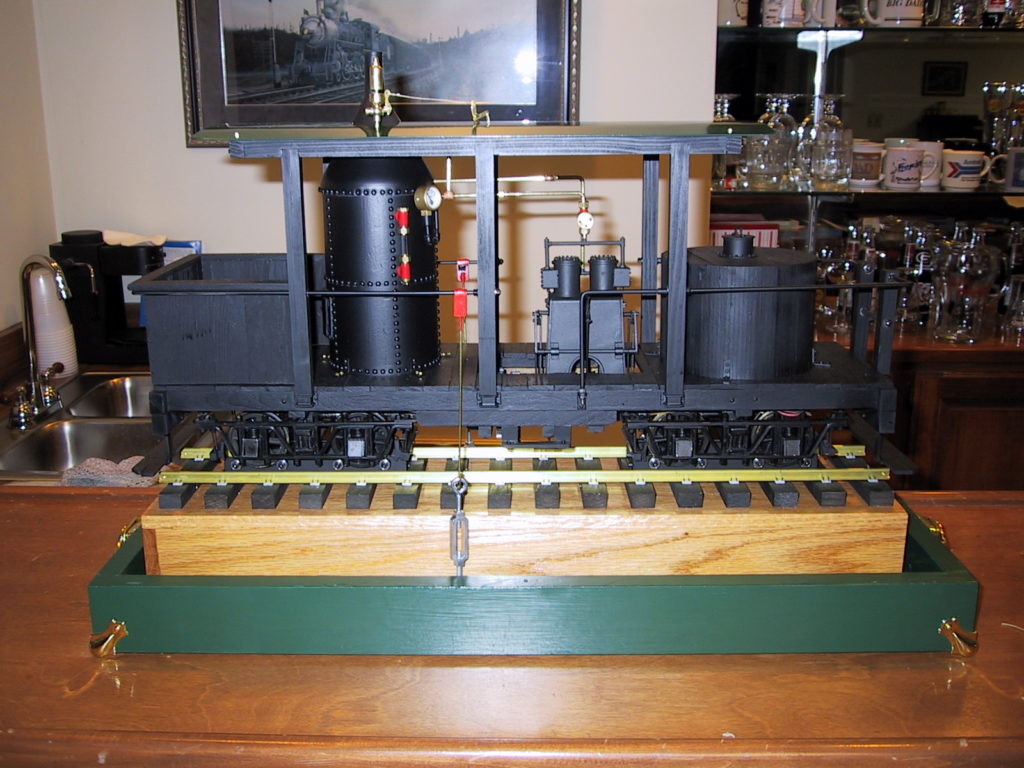
Finished – display case 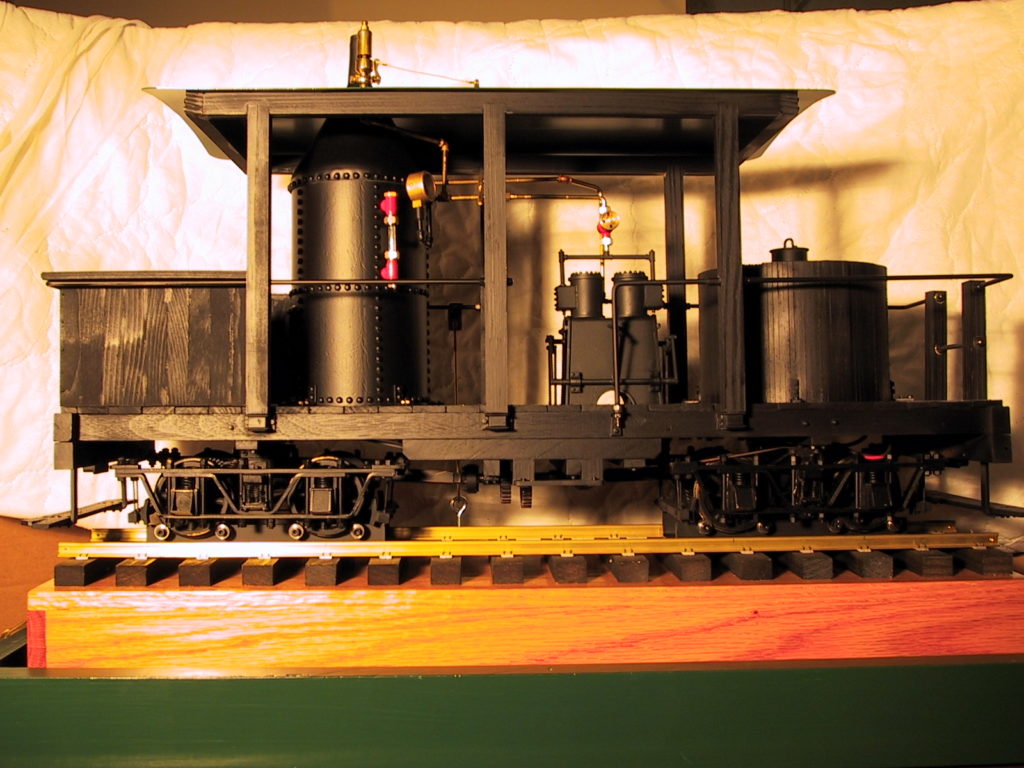
Finished – side view 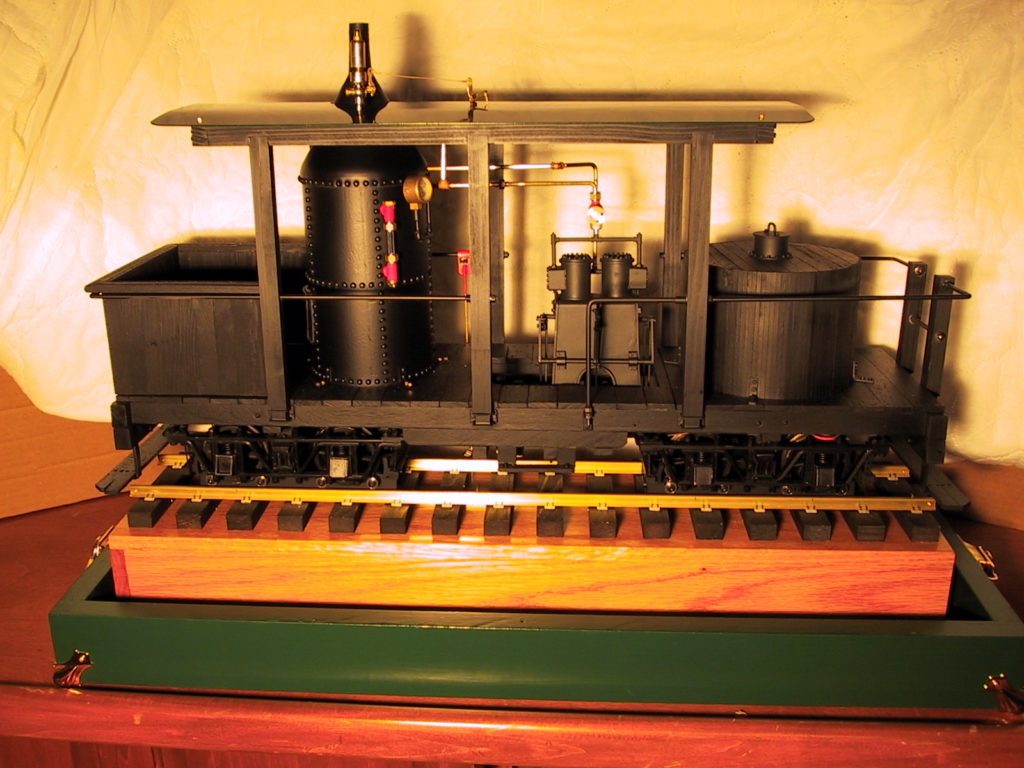
Finished – top view